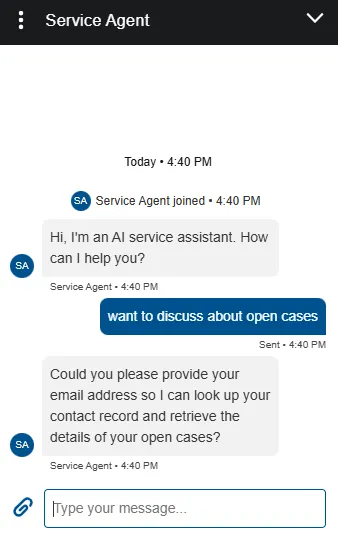


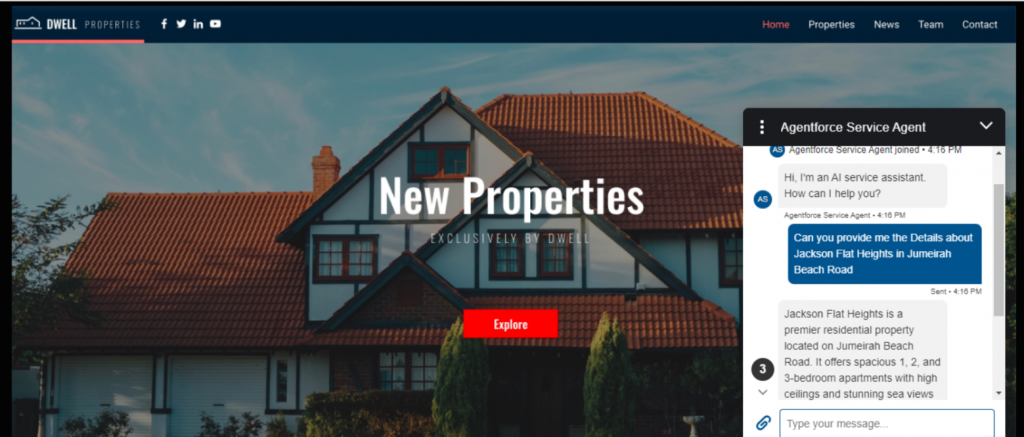


AgentForce is a cutting-edge AI-powered platform that revolutionizes customer service automation within the Salesforce ecosystem. At websites, AgentForce features Salesforce Service Agent – an intelligent virtual assistant that seamlessly integrates into Salesforce Experience pages to deliver automated, context-aware customer support. Service Agent under AgentForce enhances the standard Einstein bot capabilities by providing real-time assistance, handling routine customer inquiries, and enabling sophisticated self-service options while maintaining the security context of logged-in users. This powerful combination allows organizations to deliver personalized customer experiences efficiently, significantly reducing the burden on human agents while ensuring high levels of customer satisfaction through immediate and contextually relevant support.
Context variables in Service Agent work like memory slots that store important information about the logged-in user. Think of them as containers that hold specific details about who’s using the system right now. For example, when a customer logs into your Experience page, context variables can remember things like their name, account number, or user Id. This helps the Service Agent provide personalized responses without asking the user to repeat information we already possess.
The key reasons why context variables are essential on Experience sites:
Why do we need to ask for PII (Personally Identifiable Information) like Name or Email when the user has already logged-in to the site?
To solve this, we use the context variable in the service agent that can be set up by the steps in this article.
Required Salesforce editions and licenses:
Permission requirements:
Agentforce Service Agent User – Analyze topics and perform actions as an autonomous AI service agent.
Note : When it prompts to select a user for this agent, go with Create a new user option.
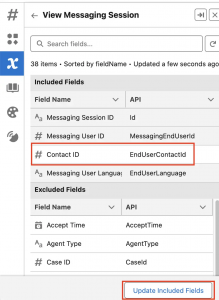
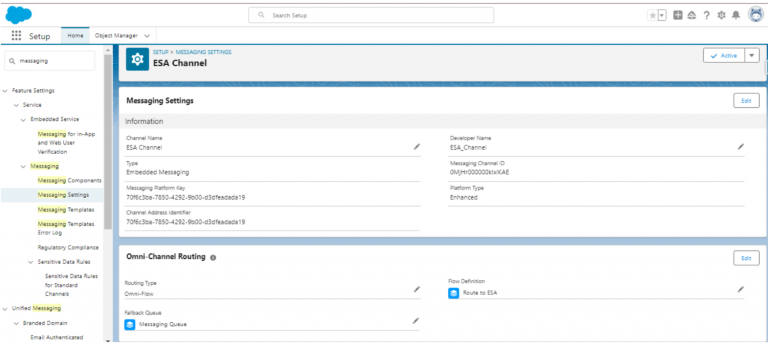
4. Add context variables to include the MessagingSession.EndUserContactId field.
5. Save and activate the agent.
Now, depending on the requirement of the use case that you are implementing, you can choose which type of Agent Action you want to create, either Flow Action or APEX Action, which will use the context variable as one of the input to get customer specific output.
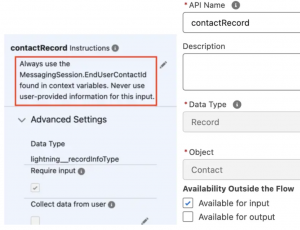
For Flow Actions, create an input variable Resource with data type as Contact Record. Under Topic Configurations tab, update the instructions to get the contact details from Messaging Session instead of getting email address from customer
For APEX Action, create the Apex class which implements your logic with a wrapper to get the input contact of the contact user logged-in on the experience site. The image given can be used for reference.
Note : Make sure that the profile of EinsteinServiceAgent User has the access to the APEX class for which the action is created. If this access is not given, the agent will be able to execute the action.
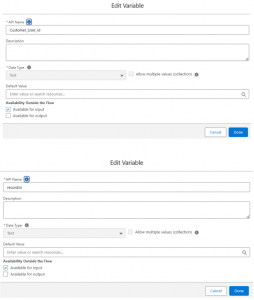
a. New Resource
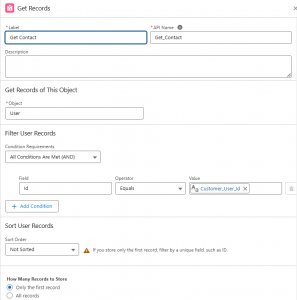
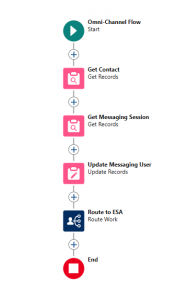
b. Get Record element to get Contact User
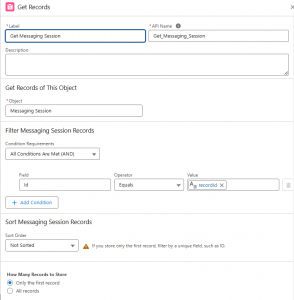
C. Get Record element to get Messaging Session
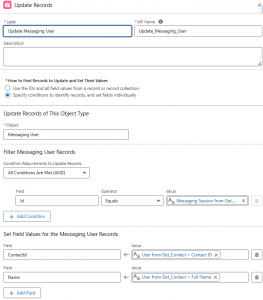
d. Update Record element to update Messaging User
Value: {!Get_Messaging_Session.MessagingEndUserId}
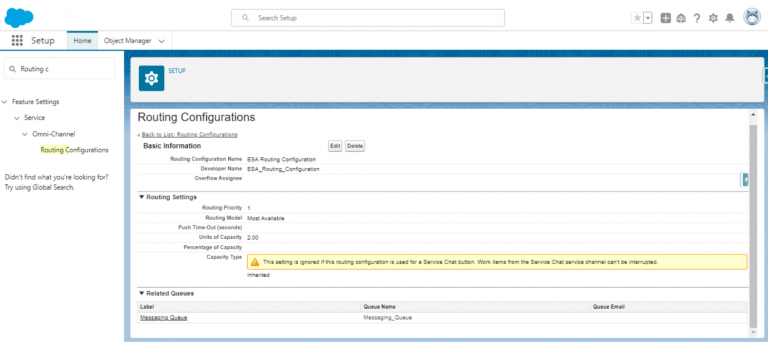
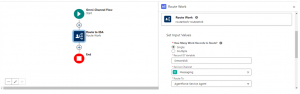
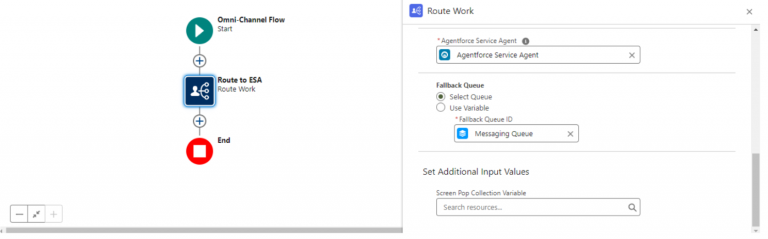
e. After Update Messaging User, add Route Work element:
Route To: Select Agentforce Service Agent.
Agent: Choose the custom agent created in Step B.
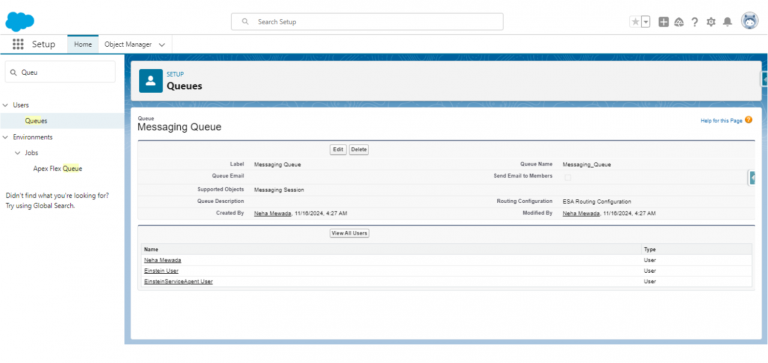
Fallback Queue: Select the Messaging Queue.
g. Save and activate the flow.
h. The flow should look like this:
e. Create a new Parameter under the Custom Parameters section.
f. Map the channel parameters with the flow variables.
g. Go to Parameter Mappings section and click New
h. Save the service channel.
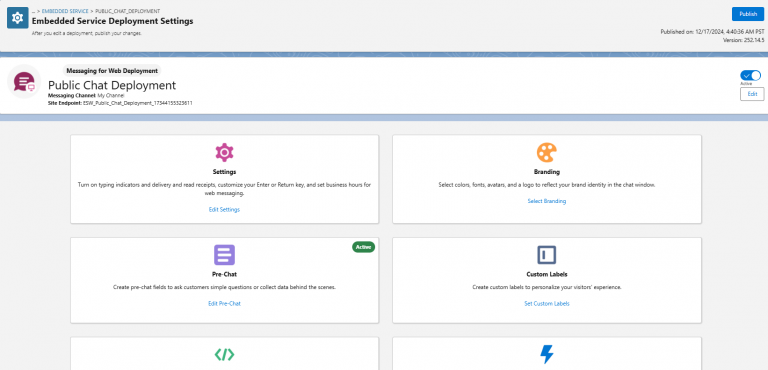
7. Configure the site according to your requirements
8. Click the Components widget .
9. Search Embedded Messaging and drag and drop the component over any section.
Note : exact placement is up to you, and it may take a few seconds for the component to appear.
10. In the Experience Site Builder, Go to Settings → Advanced → Edit Head Markup, paste the following sample script into the Head Markup
<script type=‘text/javascript’>
window.addEventListener(“onEmbeddedMessagingReady”, e => {
embeddedservice_bootstrap.prechatAPI.setHiddenPrechatFields({
“Customer_User_Id”: $A.get(‘$SObjectType.CurrentUser.Id’)
});
});
</script>
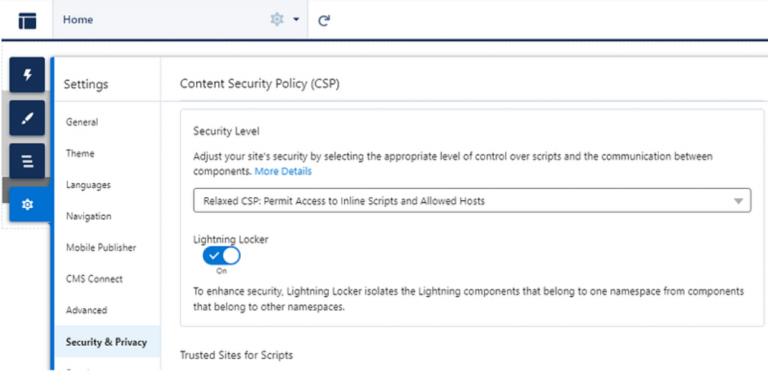
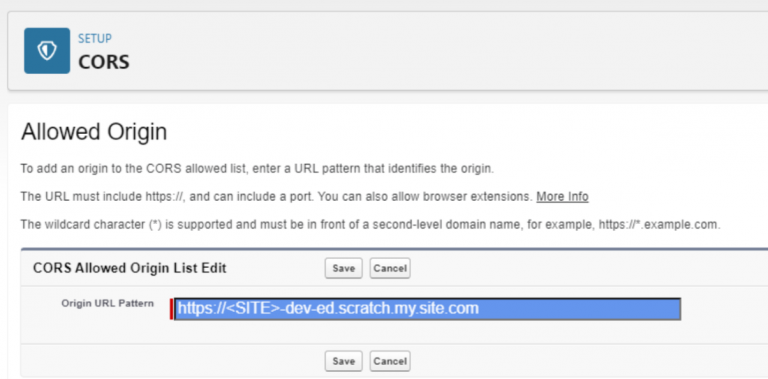
11. Update the Content Security Policy to Relaxed CSP and publish it.
Setup → CORS → New → Experience Cloud site domain
2. Make sure API name of Omni-flow variable (here Customer_User_Id), Name of variable for Script of Experience site Header (here Customer_User_Id) and Name of Custom Parameters and Parameter Mappings (here both are Customer_User_Id) variables are same.
AgentForce Service Agent, powered by Salesforce’s AI capabilities, has revolutionized how businesses handle customer service on Experience sites. By integrating context variables into the Service Agent deployment, organizations can now deliver truly personalized and secure customer experiences. This comprehensive guide has walked through the essential steps of implementation. The seamless interaction between AgentForce and context variables creates an efficient support ecosystem that adapts to each user’s specific needs and context, ultimately delivering the responsive, personalized service that modern customers expect.
For successful implementation, remember to:
Authors: Jashuva Pilla & Yogesh Kumar Soni


5 thoughts on “Agentforce Service Agent With Context Variable”
Hi, I am trying to auto fill running user as variable for Agentforce now. But I don’t think this will work. In the omniflow You get UserId and then this ID is passed to MessagingUser.ContactId. Messaging User.ContactId is lookup to contact, not user. Therefore id value of incorrect type error.
NVM it is User.ContactID, Not UserId.
Iam still not able to fill and pass {!Customer_User_Id} tho
Hi Can i pass the captured user or contact as dynamic value in Agebtforce Service Agent welcome message.
how do i test this context variable implementation scenario?
Can I show custom welcome message once agentforce service agent routed? Should we trigger any event in experience builder site. Omni Flow Inbound I am capturing few details in pre chat form and saving in messaging session context variables then calling route to work to service agent. As I captured first name, last name in context variables. Once service agent joined I would like to show welcome message saying Hi {!MessagingSession.firstname__c), I ‘m bot to serve your queries. How can I assist you? Is this possible in current agentforce service agent. If not is there a way I can do that. Is it possible based on choice selected can we show menu option