Hello there Trailblazers!! You are all set to read and develop something beyond exciting get hold of your enthusiasm and start right on!!
Lightning Web Components is a new programming model for building Lightning components.
Lightning Web Components(LWC) are custom HTML elements built using HTML and modern JavaScript. It leverages the web standards and can coexist and interoperate with the original Aura programming model, and delivers unparalleled performance.
Lightning Web Components(LWC) is built on web standards for almost all of the code involved, with a minimal amount of “custom code” that represents the core Aura runtime that underlies both technologies. This means they are more secure and faster.
Lightning Web Components uses core Web Components standards and provides only what’s necessary to perform well in browsers supported by Salesforce. Because it’s built on code that runs natively in browsers, Lightning Web Components is lightweight and delivers exceptional performance. Most of the code you write is standard JavaScript and HTML.
Differences Between Lightning Components and LWC: Why to Use LWC?
Lightning components utilize Aura framework for development and execution of Lightning components. Aura framework can be placed in same stack as Angular, React, as it provides the nuts and bolts to run your lightning components.
Lightning web components, on other hand utilize browser provided features for general component scaffolding along with Salesforce Lightning web components framework (which provides features related to security, service integration and base lightning components). As a large portion of this is now native within browser, there is an obvious cost saving in terms of processing overhead.
LWC is fast, memory efficient and easy to learn, and cost-effective.
Usage of LWC with Lightning Components:
Similar to custom lightning components, lightning web components can be utilized to create standalone components which can be embedded within
- Lightning Applications
- Custom lightning components
- Visualforce page (using lightning out) and all custom developed applications on the platform.
Yay!! You learnt a lot about LWC. Now let’s dive in and develop custom components using LWC, and also using the Lightning aura frame work, which will help us understand more and also look into the code differences.
Developing custom component using Aura Lightning Framework:

Source Code:
<aura:component implements="force:appHostable, flexipage:availableForAllPageTypes, flexipage:availableForRecordHome, force:hasRecordId, forceCommunity:availableForAllPageTypes, force:lightningQuickAction" access="global">
<lightning:card title="Lightning Components">
<lightning:icon iconName="utility:connected_apps" alternativeText="Connected" />
<p> Hello ABSYZ!!</p>
</lightning:card>
</aura:component>
Don’t worry if you are not aware of the lightning aura framework and development structures a basic knowledge of HTML, and JavaScript will help you achieve the same that’s where LWC comes in!! Let’s see how!!
Developing custom component using the LWC framework:
HTML file:
<template>
<lightning-cardtitle="Lightning Web Components"icon-name="custom:custom14">
Hello ABSYZ!
</lightning-card> </template>
Write the statement “Hello ABSYZ!” within <p> …. </p>
JS file:
[sourcecode]
import { LightningElement } from ‘lwc’;
export default class HelloWorld extends LightningElement {
}
[/sourcecode]
Xml file:
In the Xml file we define the targets(where the component can be used eg: Record page, Home page etc) along with the metadata soap api(which is used while pushing the source to the org.)<?xml version="1.0" encoding="UTF-8"?> <LightningComponentBundle xmlns="http://soap.sforce.com/2006/04/metadata" fqn="helloWorld"> <apiVersion>45.0</apiVersion> <isExposed>true</isExposed> <targets> <target>lightning__AppPage</target> <target>lightning__RecordPage</target> <target>lightning__HomePage</target> </targets> </LightningComponentBundle>
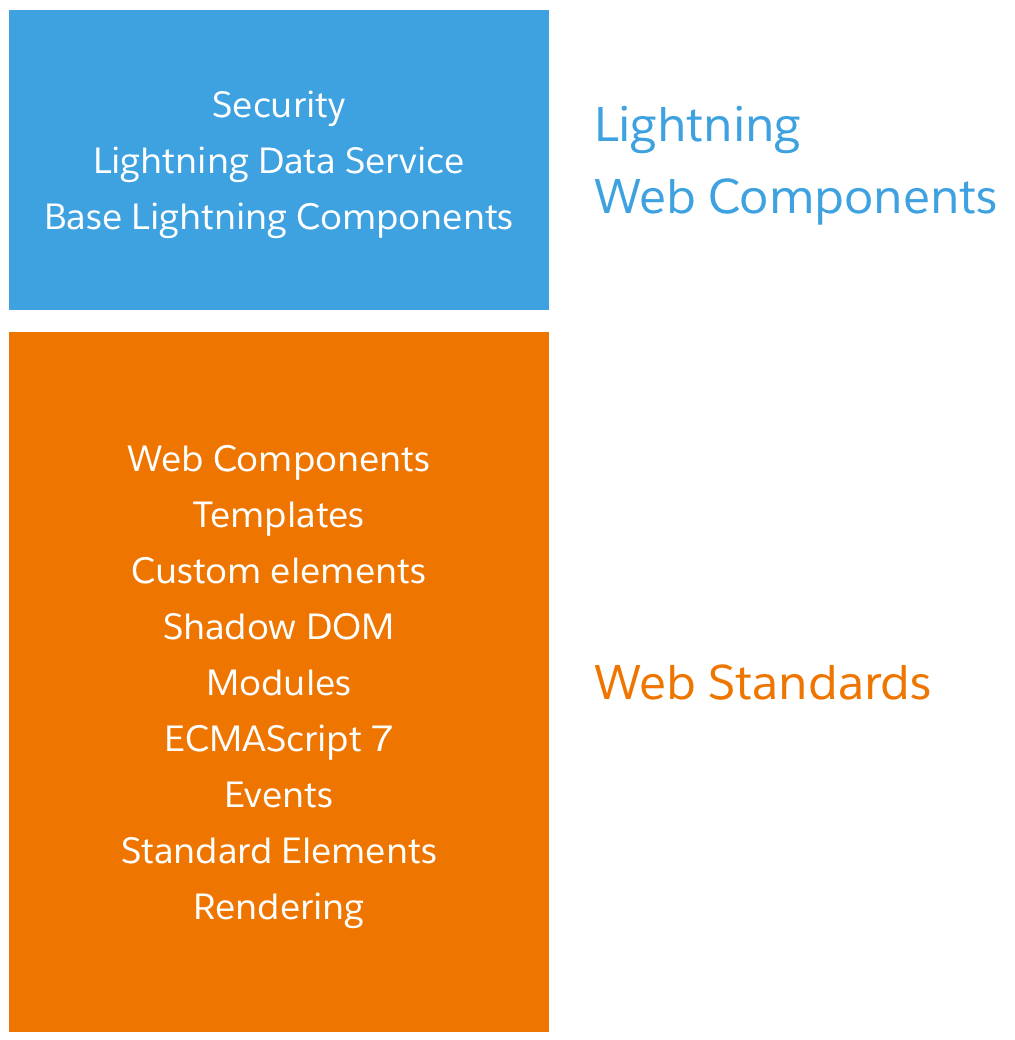
The image below gives an overview of the LWC stack and improvised framework.

Lightning Web Components provides a layer of specialized Salesforce services on top of the core stack, including:
- The Base Lightning Components, a set of over 70 UI components all built as custom elements.
- The Lightning Data Service which provides declarative access to Salesforce data and metadata, data caching, and data synchronization.
- The User Interface API, the underlying service that makes Base Lightning Components and the Lightning Data Service metadata aware, leading to substantial productivity gains.
You might have noticed the Lightning experience UI rendering speed has gradually increased over years, and that’s partly because the UI is now mostly LWC, and the all/most standard Lightning part of the Lightning Component library is LWC under the covers, which has contributed to faster Aura performance.
Creating a Lightning Web Component:
Lightning Web Components are available from the Spring’19 Release. In order to create an LWC make sure you register for a preview Spring ’19 org and start the development.
To create and develop Lightning Web Components and leverage their powerful features and performance benefits, you need to set up Salesforce DX.
what is Salesforce DX(SFDX)??
The Salesforce Developer Experience (DX) is a set of tools that streamlines the entire development lifecycle. It improves team development and collaboration, facilitates automated testing and continuous integration, and makes the release cycle more efficient and agile.
Set Up the Development Environment:
In order to create a LWC, Salesforce suggests that we use Visual Studio Code, as the development environment. Salesforce standard extensions are easily available for VS code which is integrated with the SFDX CLI.
Download the Salesforce DX CLI for your system and setup the requirements. Once installed you can check whether it is installed correctly or not.
Goto CLI –> Type sfdx plugin –> it will display the version number if installed correctly.
Once done Configure your Visual Studio Code, and download the Salesforce Extension and LWC extension for it.
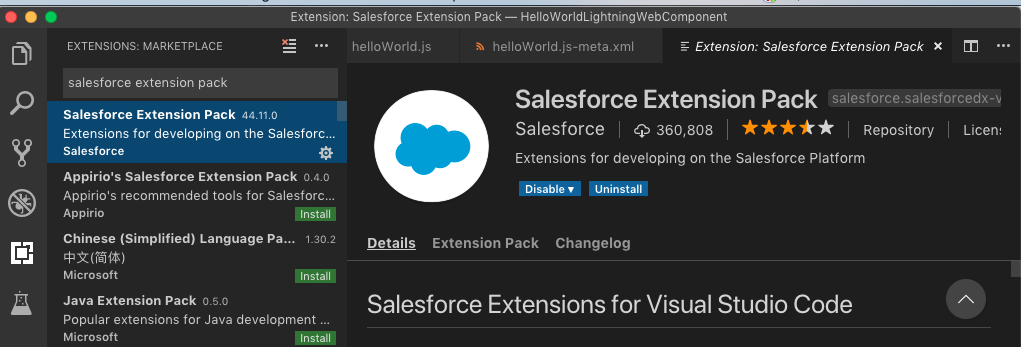
Goto your VS code, click on Extensions icon and search for Salesforce Extension Pack, and install it.
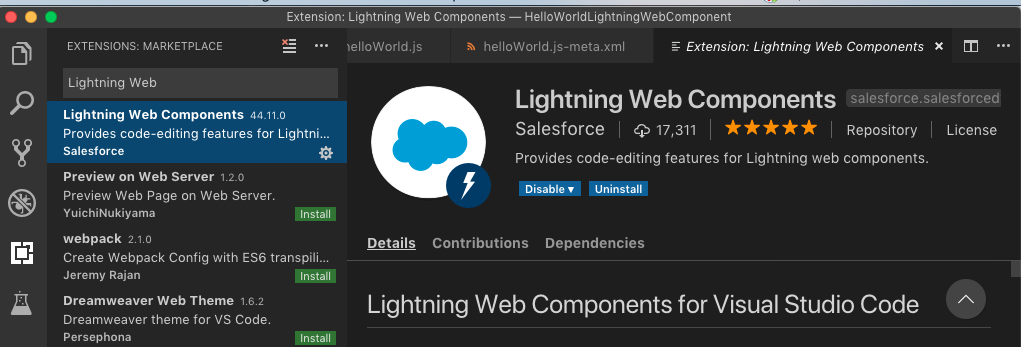
After installing the extension, now install the Lightning Web Component Extension Pack.
Once done, and after making sure your development environment is ready, open your Visual Studio (VS) Code and press Ctrl + shift + p (windows) and alternatively Command + shift + p (macOS).
Press Command + Shift + P (Use alternatively for windows), and type sfdx, then select “create a project”.
Enter a Project name and then select a folder to save the project locally. Once done, click on create project.
After creating a project, you need to authorize a Dev hub, eventually you will be creating your LWC in a Connected Scratch Org, which once after development you can push it to your Connected DE orgs and Preview Orgs.
Authorize a Dev hub by again typing sfdx and then select “authorize a dev hub”. Log in with your pre release Dev Hub org Credentials and then click allow.
Once your dev hub is authorized, create a scratch org, press command + shift + p and then select “sfdx: create a default scratch org”.
Press enter and accept the defaults, once created you will receive a response like this:

Once done, again on your VS Code press command + shift + p and then select Create a LWC. Press enter to accept the defaults, and then provide name for the component.
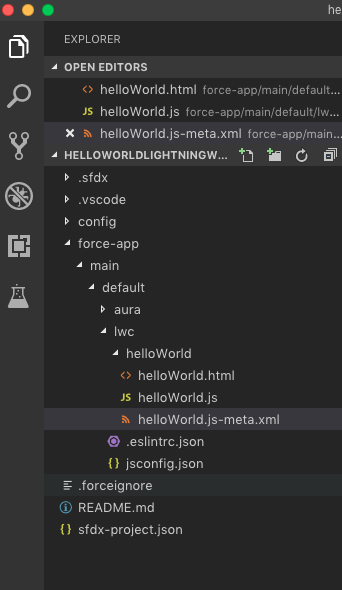
Press Enter and you can see the newly created files in VS Code. The image below gives an hierarchical overview of the files structure of LWC.
Copy and paste the following sample code in the files, or you can write your own version!! Anything is a GO!!
helloWorld.html:
<template>
<lightning-card title="HelloWorld" icon-name="custom:custom14">
Hello, {greeting}!
</lightning-card>
</template>
Write the statement Hello, {greeting}! within <p> …… </p>
helloWorld.js :
[sourcecode language = “javascript”]
import { LightningElement, track } from ‘lwc’;
export default class HelloWorld extends LightningElement {
@track greeting = ‘World’;
changeHandler(event) {
this.greeting = event.target.value;
}
}
[/sourcecode]
helloWorld.js-meta.xml:
<?xml version="1.0" encoding="UTF-8"?>
<LightningComponentBundle
	xmlns="http://soap.sforce.com/2006/04/metadata" fqn="helloWorld">
<apiVersion>45.0</apiVersion>
<isExposed>true</isExposed>
<targets>
<target>lightning__AppPage</target>
<target>lightning__RecordPage</target>
<target>lightning__HomePage</target>
</targets>
</LightningComponentBundle>
Make sure that the component names are same for all your source. Once done, save the source and push it to your Scratch Org. Press Command + Shift + p and then select “Push Source to default Scratch Org”.
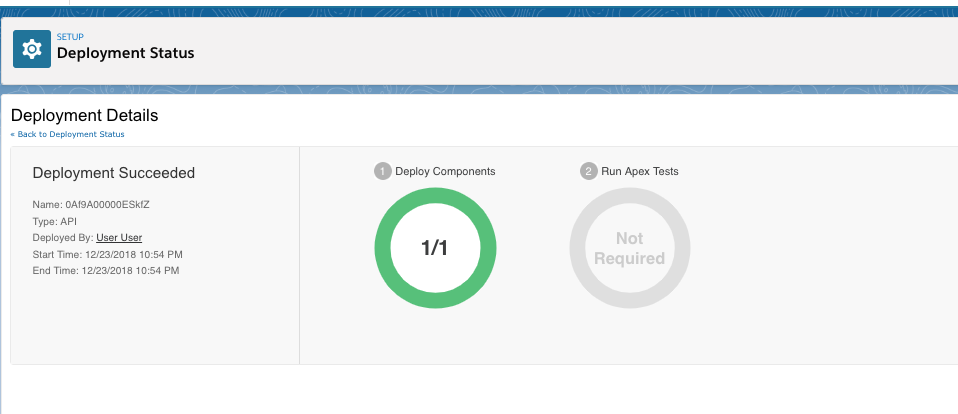
Open your Scratch org by selecting “Open Default Org” and once your org opens up in browser from quick find type “Deployment Status” to check whether your component is Successfully deployed.
If the status indicates success your component is deployed successfully.
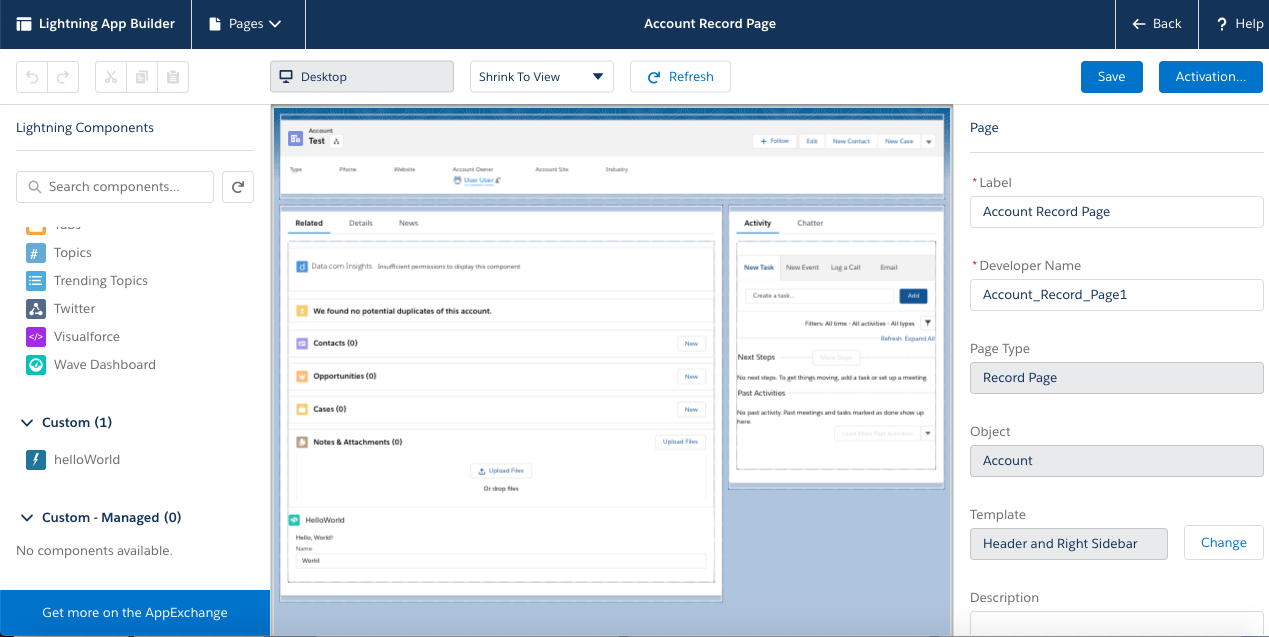
Once deployed in your scratch org, open any lightning record/home page and click on edit then add the custom LWC. Assign it to your org, or to an app based on your criteria, activate it and save it.
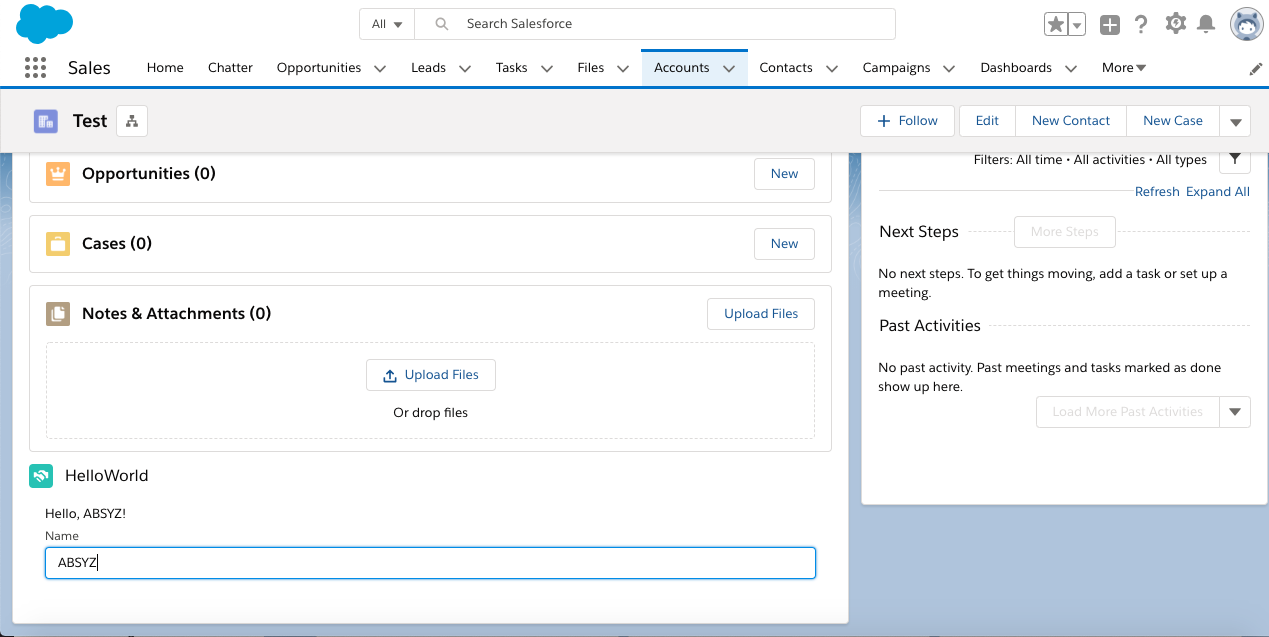
There you go, you have just created a Lightning Web Component!! With the introduction of LWC Salesforce has opened up immense opportunities for Developers with any background to be able to build and develop on the Salesforce platform.
Pat your Shoulders, do more and blaze your trail!!


