Gearset is a powerful DevOps tool for Salesforce that simplifies change tracking and deployment, making the release process more efficient.
Salesforce administrators and developers often find themselves grappling with the intricacies of deployment changes between Salesforce environments using native tools like Changesets and the Ant (Force.com Migration Tool). While these tools serve a purpose, they come with their fair share of limitations, prompting many to seek more robust and efficient solutions. This is where Gearset, a powerful DevOps tool for Salesforce, steps in to revolutionize the deployment process.
Gearset Setup:
You can sign up for a 30 days free trial for Gearset here. Once you sign up, Gearset asks you to do a quick Org Compare, you can select the option specification that you know your way around the app.
Making the Shift to Gear Set: A Step-by-Step Guide
You can sign up for a 30 days free trial for Gearset here. Once you sign up, Gearset asks you to do a quick Org Compare, you can select the option specification that you know your way around the app.
1) Set Up Salesforce Environments
Navigate to Salesforce orgs under My Connections section on the left menu panel.

- Click on Add new Organization button, keep Salesforce Authentication selected, provide your production username and select Production Organization in the type of org and then click Authorize button. It will redirect you to the salesforce login screen. Provide your Salesforce credentials and authorize Gearset Deploy connected app.
- You will be redirected again to Gearset, provide a Friendly Name as Production and click Ok button.
- Repeat these steps again to authorize all the required Salesforce environments.
2) Set Up Version Controls
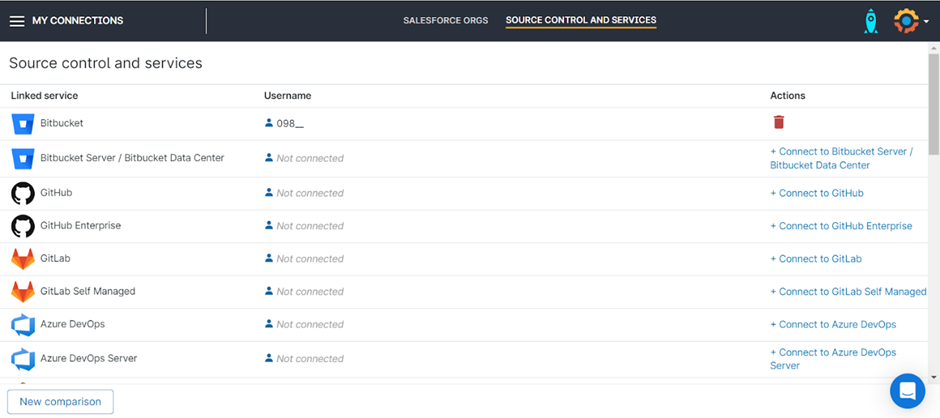
- We will be using Bitbucket as version control for this demonstration. You can authorize any other VCS like GitHub, GitLab etc.
- Click on Connect to Bitbucket, it will redirect to Bitbucket and provide your Bitbucket credentials to successfully setup.
- Go to your Bitbucket home page and click the create repository button under the Repositories section to create a new repository.
- Specify a name for your repository, select private if you want only specific people to access your repository.
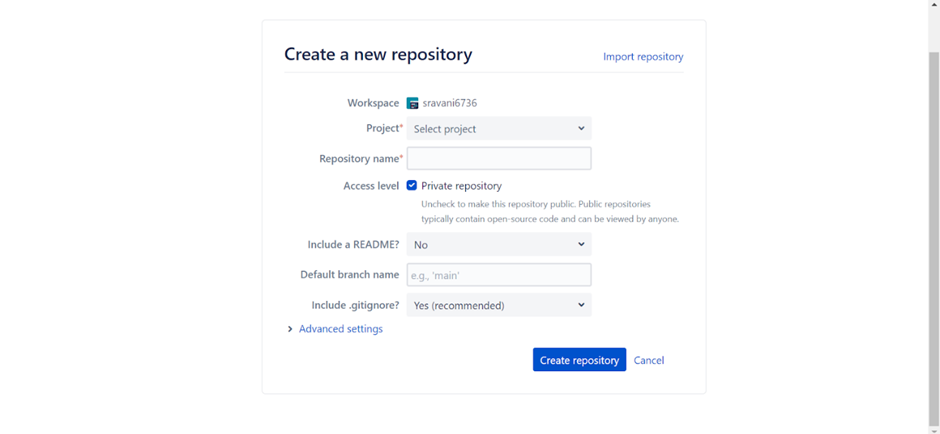
- Please check the name of the default branch that will be created. By default, it is the main branch, but we have modified its name to master.
3) Commit Production Metadata
- In the SFDX folder, locate the entire metadata in the force-app folder and package.xml in the manifest folder. This format contains the sfdx-project.json file at the root. If you are using VS Code then you will be more familiar with this metadata format.
- For this demo, we’re proceeding with the SFDX format. Commit the sfdx-project.json file into our “master” branch.
- Click on the “Stage Changes” icon. Provide a commit message and click “Commit & Sync Changes” to commit directly to the “master” branch. Please note that developers should not be committing directly into the master branch but since we are just setting up the process this can be ignored
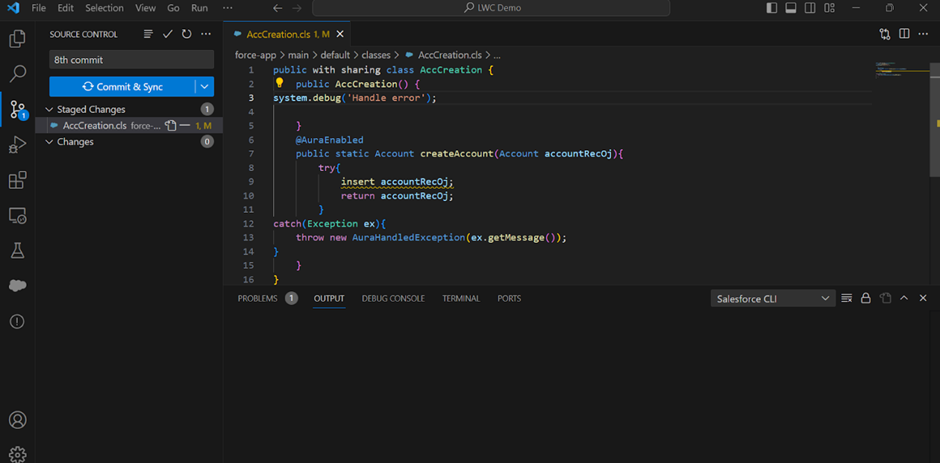
- Next go to Gearset and select “Compare and Deploy” from the left panel.
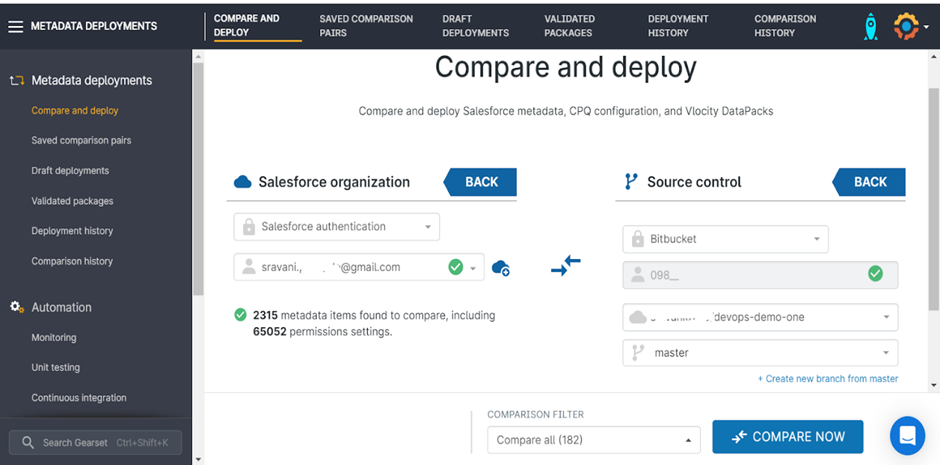
- Set your source metadata location to your production Salesforce environment and the target metadata location to your Bitbucket master branch.
Code Comparison:
- One way to do code comparison is to change the metadata comparison filter from the default comparison to “Compare All” to include all metadata for the commit and this option is useful in scenarios where you want to review and compare every aspect of the source and target environments, without focusing on specific subsets of metadata.
The Other way is to Navigate to the “Manage Custom Filters” option within the Comparison Filters, opt for the default comparison settings and deselect all existing filters from the left-side panel, and select the specific category that aligns with your component type, and initiate the selection of individual components by choosing the “All Items” option. This action activates the “Named Items” feature, allowing you to select required components and click ok, then click on compare now to start the comparison.
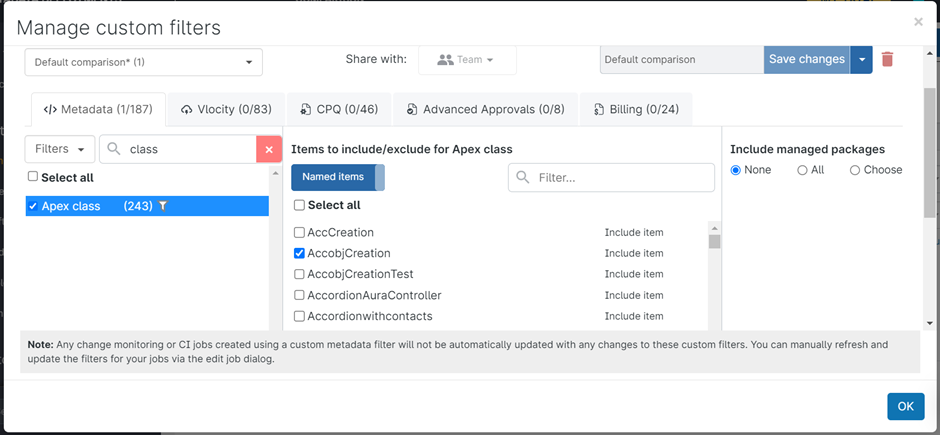
- Click the “Compare Now” button to initiate the comparison process.
- On the next screen, you’ll see a list of metadata retrieved from the source. As our master branch is empty, all items are new. The lower half displays XML differences.
- To export the list, click “Export All” at the bottom right. Select all metadata and click “Next” to proceed.
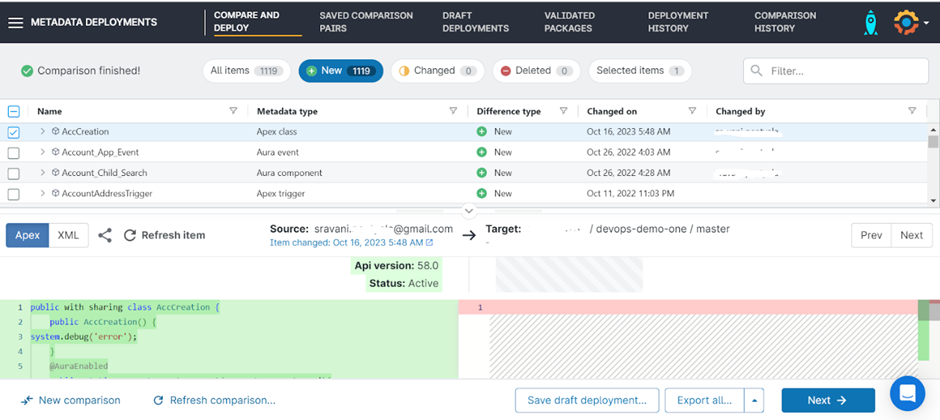
- On the subsequent screen, Gearset conducts quality checks on code and metadata in the Gearset Problem Analysis. For now, let’s disregard these checks. Click “Next.” It will prompt for confirmation; click “Continue to Summary.”
- Provide a commit message and click “Commit Changes.” Note that the “Validate Deployment” button is inactive since the destination is a Bitbucket branch, not a Salesforce environment.
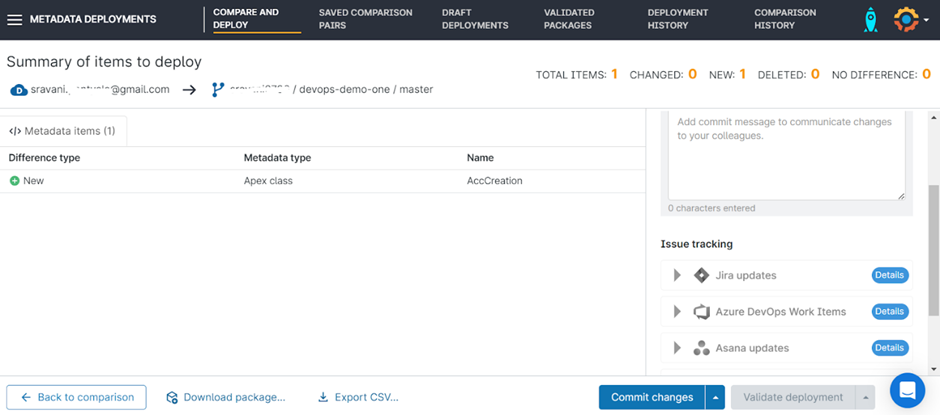
- A pop-up will appear; choose “Deploy.” After a successful deployment, you’ll be redirected to the result screen. Additionally, check your email for a deployment report.
- Verify your master branch to see the committed metadata. Congratulations! You’ve successfully established a master branch and committed metadata from your Production environment.

Click here for the next part of this series, where we had dive into the detailed process for Gearset.

