As an iOS developer, you may find yourself asking one day: how do I integrate native iOS frameworks into my React Native application? This blog will shows you how to add an iOS native framework in react native project.
Features
Custom SDK which provides you basic details of the card and in return the package displays the card details.
Getting Started
Open the iOS folder in the React Native project with Xcode.
Folder: {YourReactNativeProjectName}>ios>{yourprojectname}.xcworkspace
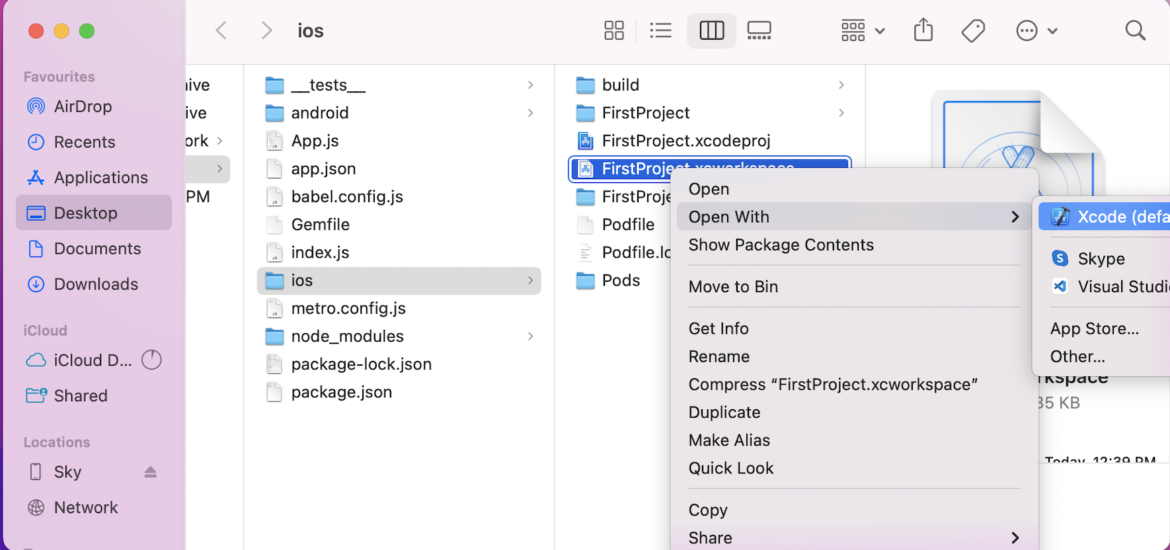
Use this Framework as a SDK
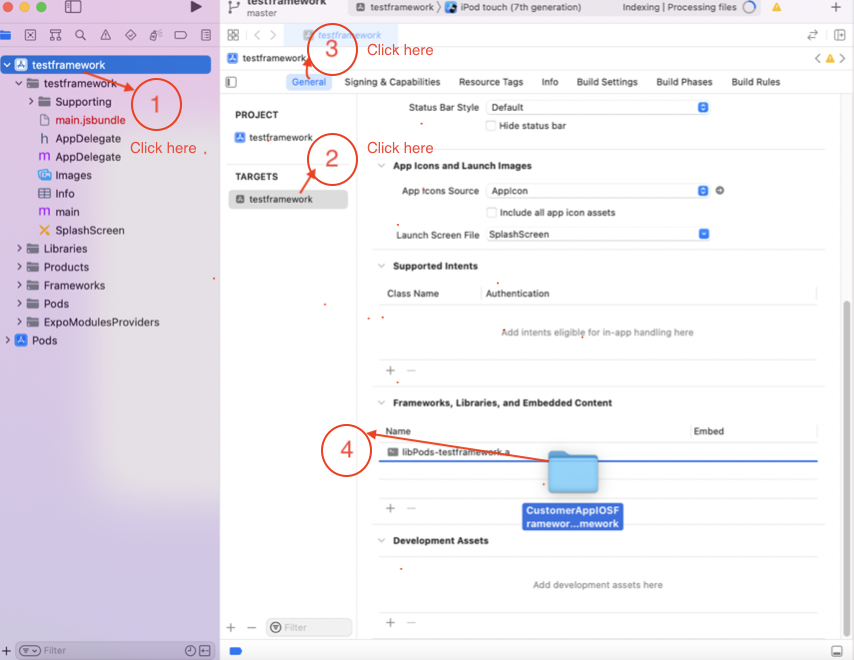
Add your XCFramework file here by dragging and dropping it in Frameworks, Libraries, and Embedded Content.
Path: {YourReactNativeProject}>iosgenerayourprojectname}.xcworkspace
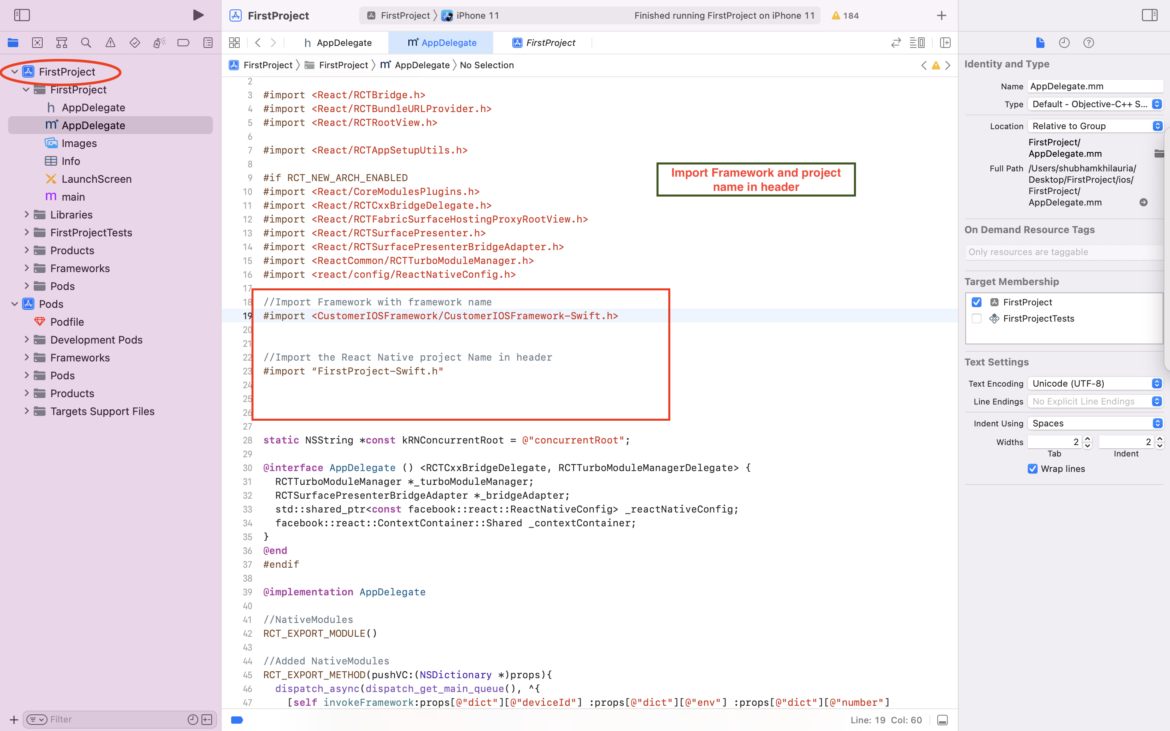
Switch to AppDelegate.m in the iOS folder and import the framework and import the react native project name as header:
AppDelegate.m
Import framework:
#import <CustomerIOSFramework/CustomerIOSFramework-Swift.h>
Import the React Native project Name in the header.
Example:“testframework” is the name of the project
Replace with your project name and import in the header.
#import “FirstProject-Swift.h”
Usage
Add the native modules and invoke framework methods in AppDelegate as below the implementation of AppDelegate .
Folder: ReactNativeProject>ios>projectname>AppDelagate.m
@implementation AppDelegate
//NativeModules
RCT_EXPORT_MODULE()
//Added NativeModules
RCT_EXPORT_METHOD(pushVC:(NSDictionary *)props){
dispatch_async(dispatch_get_main_queue(), ^{
[self invokeFramework:props[@”dict”][@”deviceId”] :props[@”dict”][@”env”] :props[@”dict”][@”number”] :props[@”dict”][@”sdkAuth”] :props[@”dict”][@”priOrgId”] :props[@”dict”][@”templetType”] :props[@”dict”][@”language”] ];
});
}
//Invoking the CustomeriOSFramework
– (void)invokeFramework:(NSString*)deviceId :(NSString*)env :(NSString*)number : (NSString*)sdkAuth : (NSString*)priOrgId : (NSString*)templetType : (NSString*)language
{
UIWindow *window = [[UIWindow alloc] initWithFrame:[[UIScreen mainScreen] bounds]];
NSBundle *amazingBundle = [NSBundle bundleForClass:[LoadingVC class]];
LoadingVC *yourVC = [[LoadingVC alloc] initWithNibName:@”LoadingVC” bundle:amazingBundle];
yourVC.env = env;
yourVC.number = number;
yourVC.deviceId = deviceId;
yourVC.sdkAuth = sdkAuth;
yourVC.priOrgId = priOrgId;
yourVC.templetType = templetType;
yourVC.language = language;
[[UIApplication sharedApplication].delegate.window.rootViewController presentViewController :yourVC animated:YES completion:nil];
[window makeKeyAndVisible];
}
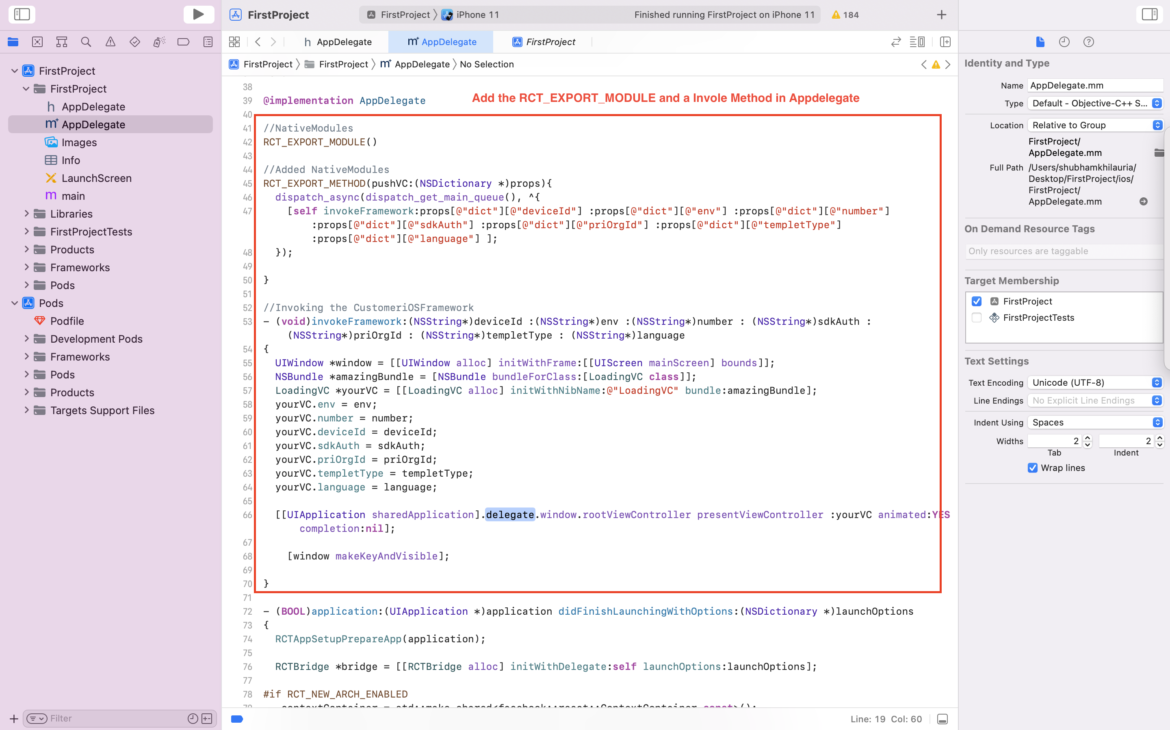
Write a calling method in React Native Project as on the specified as per developer choice Check out the below code snippet for the same.
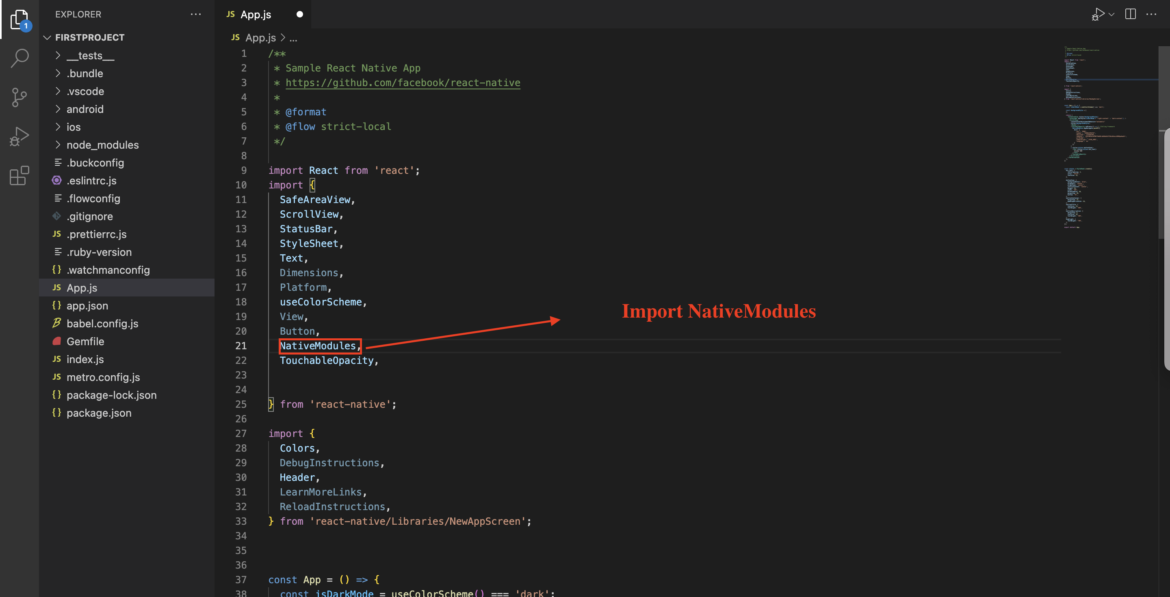
Import the NativeModules:
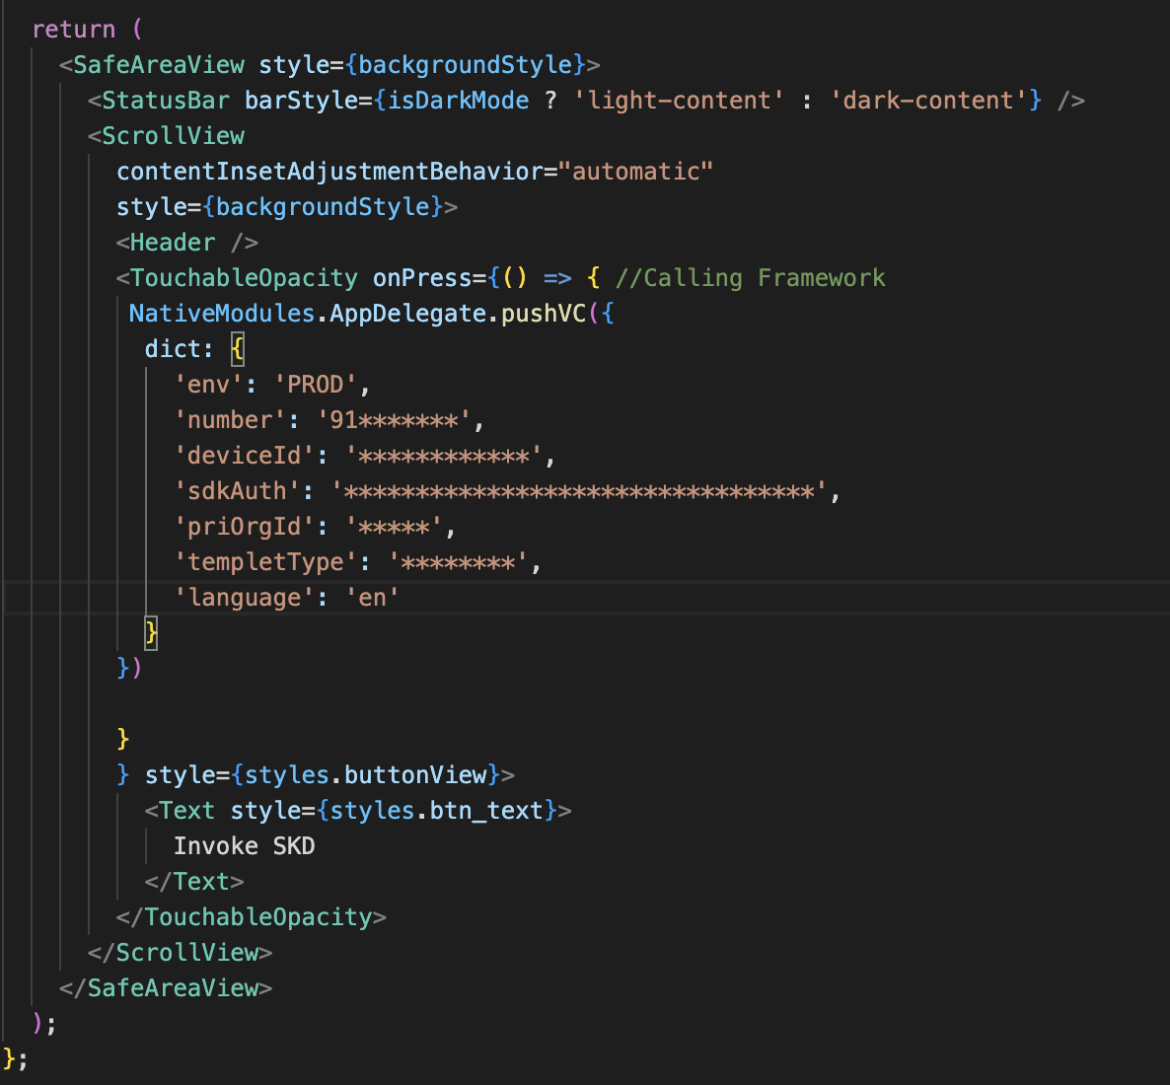
Calling and passing the props to the Customerframework through Native Modules:
NativeModules.AppDelegate.pushVC({
dict: {
‘env’: ‘PROD’, //provide environment here
‘number’: ’91*******’,//provide mobile number here
‘deviceId’: ‘************’,//provide device id here
‘sdkAuth’: ‘*********************************’, //provide Authentication Token here
‘priOrgId’: ‘*****’, //provide primary organization id here
‘templetType’: ‘********’, //provide your template name here
‘language’: ‘en’ //provide language type here
}
})
Final Output
👉 A native application screen will appear in a react native project.
Conclusion:
In this blog, we have shown you how to add and invoke the iOS native framework to the React Native project.The React Native team is currently working on a re-architecture of the Native Module system. This new system is called TurboModules, and it will help facilitate more efficient type-safe communication between JavaScript and native, without relying on the React Native bridge. It will also enable new extensions that weren’t possible with the legacy Native Module system. You can read more about it here. Throughout these docs we have added notes around parts of Native Modules that will change in the TurboModules release and how you can best prepare for a smooth upgrade to TurboModules.
Additional reading: How to Add an iOS Native Framework in the Flutter Project?


