How To Load Data From Postman Into Data Cloud Using Ingestion Api

How To Load Data From Postman Into Data Cloud Using Ingestion Api

Introduction

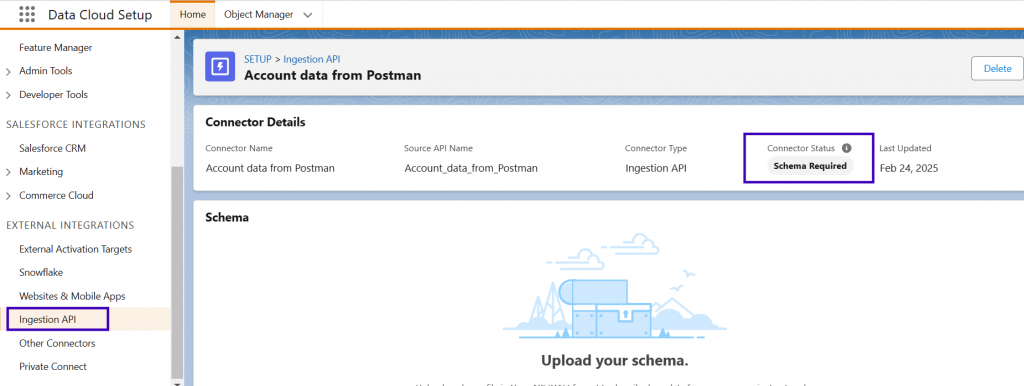
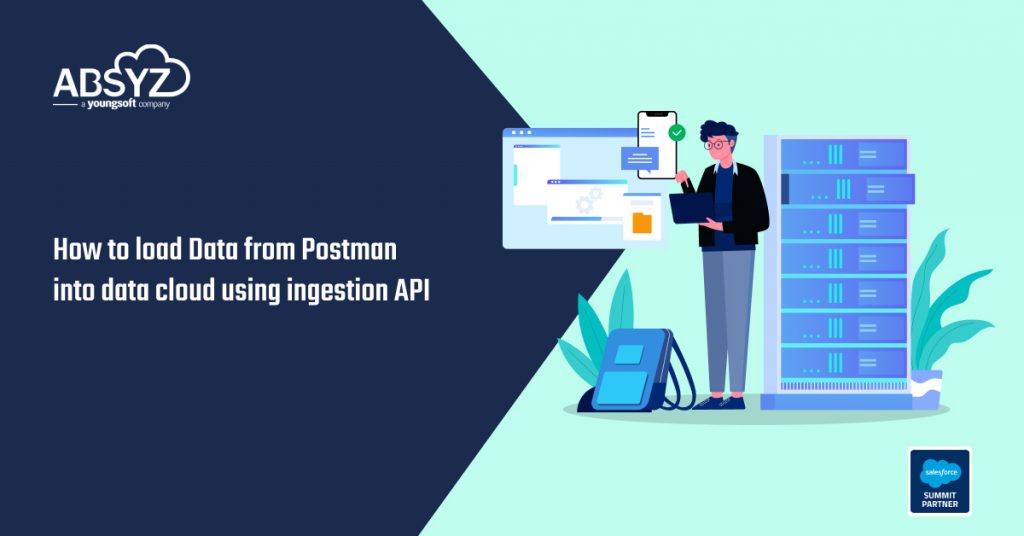
Finding effective solutions to manage the ever-increasing and complicated amount of data from several sources is essential. In this situation, the Ingestion API can be of great assistance. It enables you to use the Ingestion API Connector to import data from external sources into the data cloud. It is a REST API that provides bulk and streaming as two methods of importing data.

STREAMING INGESTION API

  • Through the streaming ingestion API, we can upload small data sets to the data cloud in near real-time. 
  • Per single request, we can send small payloads of up to 200kb
  • Data is processed with an expected latency of around 3 minutes

BULK INGESTION API

  • Through the bulk ingestion API, we can upload bulk CSV data to the data cloud as jobs
  • This comes in handy when we have historical data or batches of data to migrate
  • We can load large CSVs up to 150 MB

Read on to learn how this operates in practice as we walk you through each step!

Step 1: Set Up the Ingestion API Connector

  • Navigate to Data Cloud Setup, search for ‘Ingestion API’, click New, and enter a connector name.
  • You will see that the Connector Status has been updated to ‘Schema Required’
  • Upload the schema in OpenAPI format. The schema defines the objects and fields that will be sent via API.
  • Once uploaded, the connector status will show ‘Needs Data Stream’. This means you need to create a data stream next.

Step 2: Create and Deploy a Data Stream

    • Go to Data Streams from App Launcher and click ‘New’.
    • Choose Ingestion API as the source.
    • Select the objects for which you want to create the data stream.
    • Choose the category and fill in the Primary ID (and Event Date Field for engagement data).
    • Deploy the stream.
    • Once successfully deployed, the connector status updates to ‘In Use’.

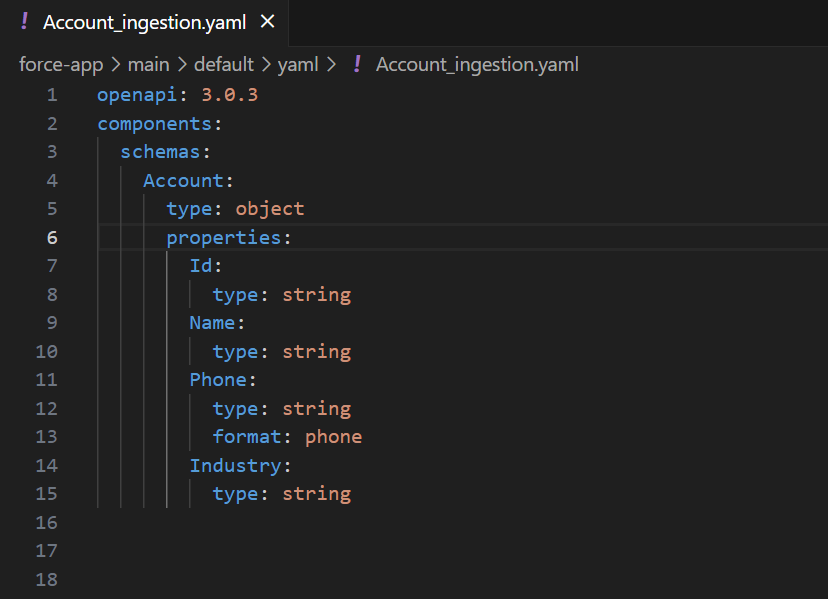
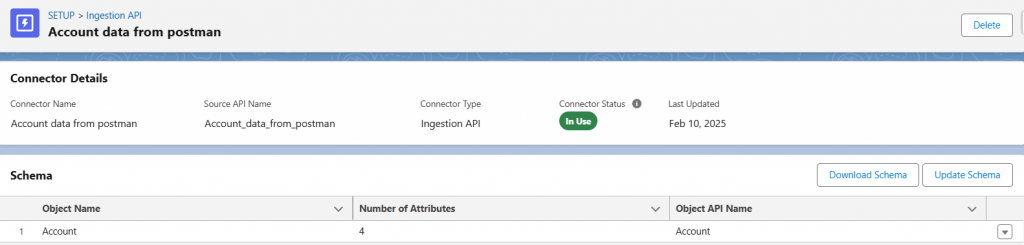
If new objects or fields need to be added in the future, update the schema directly from the connector.

Step 3: Create a Connected App for Authentication

  • Navigate to App Manager and create a new connected app.
  • Enable OAuth settings and set the Callback URL (same as Postman callback URL).
  • Add the following OAuth scopes:
  • Enable Client Credentials Flow.
  • Save the app and then go to Manage → Edit Policies.
  • Set Permitted Users to “All users may self-authorize” and IP Relaxation to “Relax IP restrictions”.
  • Under Client Credentials, specify the user to run as.

Step 4: Authenticate in Postman

4.1 Get Access Token

    • Create a new workspace in Postman and fork the Salesforce Data Cloud Connect API collection.
    • Open a new tab and send a POST request:
      https://{{YOUR_DOMAIN}}/services/oauth2/token?grant_type=client_credentials&client_id=YOUR_CLIENT_ID&client_secret=YOUR_CLIENT_SECRET
    • Extract the access_token from the response body.
    • Add the token under Authorization in Postman.
  • Populate the variables where:
    • clientId = Consumer Key of the Connected App
    • clientSecret = Consumer Secret of the Connected App
    • dcTenantUrl = Tenant-specific endpoint from Data Cloud setup
  • Complete the Postman Authentication by clicking on send

4.2 Exchange Access Token for Data Cloud Tenant Token

  • Send a POST request:
    https://ab1735537571963.my.salesforce.com/services/oauth2/token

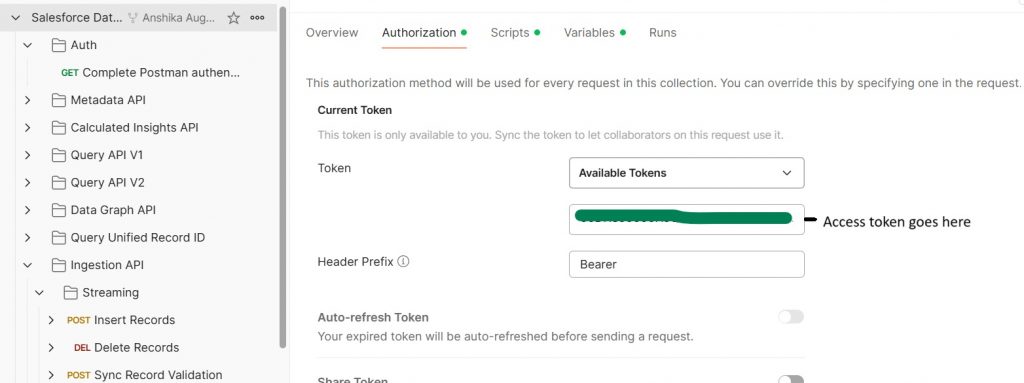
Header – Authorization: Bearer access_token

Body-

KEY 

VALUE

grant_type

urn:ietf:params:oauth:grant-type:token-exchange

subject_token

YOUR_ACCESS_TOKEN

subject_token_type

urn:ietf:params:oauth:token-type:access_token

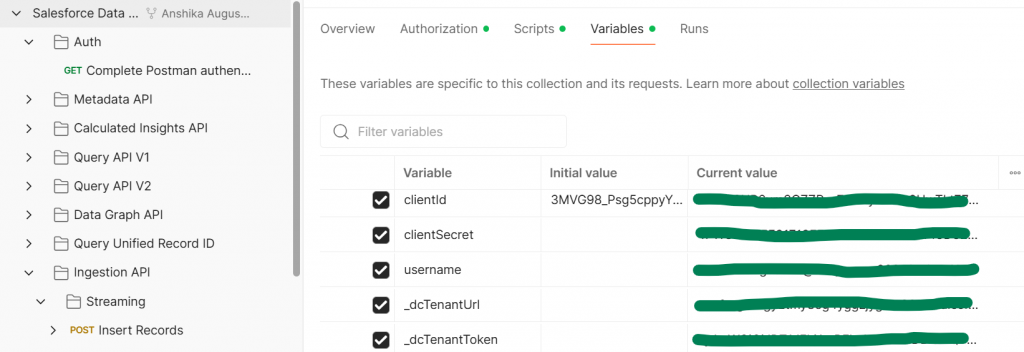
Go back and check the variables; you’ll see that the data cloud tenant token is automatically generated.

Now the setup is done.

Step 5: Use the Streaming Ingestion API

  • Navigate to POST Insert Records under Streaming in Ingestion API.
  • Update the POST URL by replacing /connector_name/object_name with your connector name and the object to which you want to send the data.
  • Send the request and check if the response contains accepted: true.
  • Wait 3-15 minutes, then verify if the data has been streamed.

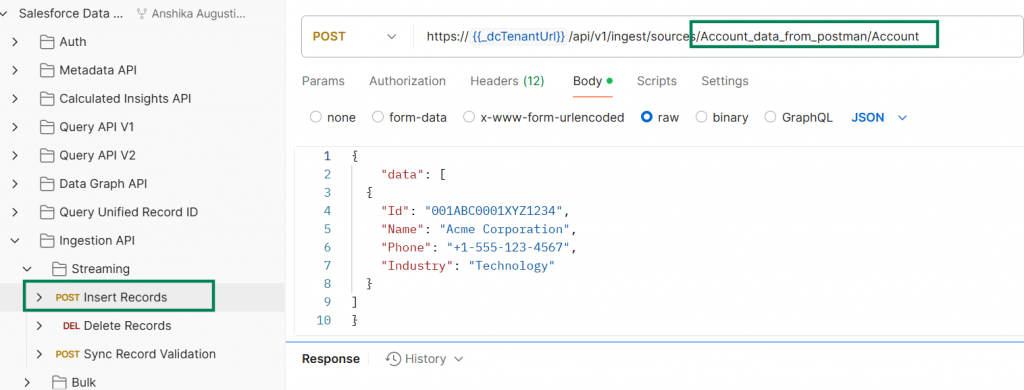
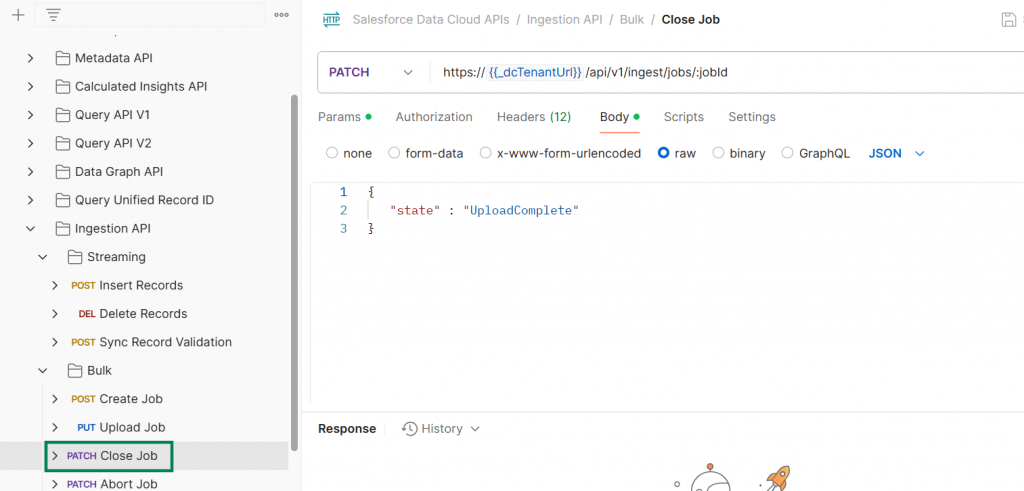
Note: You can validate data before sending it using POST Sync Record Validation to ensure data integrity.

Step 6: Use the Bulk Ingestion API

6.1 Create a Job

  • Send a POST request to create a job:
    POST Create a job
  • Extract and store the job_id from the response.

6.2 Upload Data

  • Send a PUT request to upload the job:
    PUT Upload Job

6.3 Close the Job

  • Send a PATCH request to close the job:
    PATCH Close Job
  • Wait 3-15 minutes for the data to be ingested.

Step 7: Verify Data in Data Explorer

  • Navigate to Data Explorer in your Salesforce org.
  • Locate your Data Lake Object and verify that the data is present.
  • Identifiers:
    • IDs starting with 00 indicate streaming data.
    • Other IDs indicate bulk ingested data.

For API limits and additional details, check the Salesforce Ingestion API Guide.

Conclusion

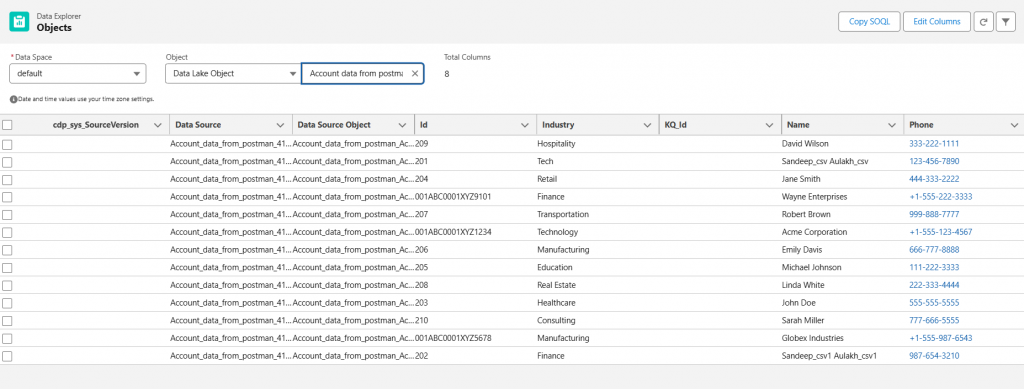
These steps will show you how to use the Ingestion API to import data from Postman into Salesforce Data Cloud effectively. Data Cloud offers a reliable and scalable method for smoothly integrating external data sources, whether through streaming or bulk ingestion. Get started using Data Cloud’s power right now!

Author: Anshika Augustine

Leave a Comment

Your email address will not be published. Required fields are marked *

Recent Posts

A Fresh Look for Salesforce- Unpacking the New UI and SLDSjpg
A Fresh Look for Salesforce: Unpacking the New UI and SLDS 2.0
How To Load Data From Postman Into Data Cloud Using Ingestion Api
Jira_ A Comprehensive Guide to Agile Project Management
Jira: A Comprehensive Guide to Agile Project Management
Unlocking Efficiency with Salesforce Field Service Lightning (FSL)
Unlocking Efficiency with Salesforce Field Service Lightning(FSL)
How To Send Email Along with PDF Document Attached
Scroll to Top