Hi All,
Recently I was working on a requirement where I had to extract the data stored in an image file, data like the location where the image was taken and the date of image capture is classified data which is embed in the image/picture itself. After doing some research on this topic, I found out a way to extract this data from an image, which I thought it would be helpful for all of us, if we have resource/blog to refer it later on similar requirements.
Many of us don’t know that when we capture the image, it will store the date, size, dimensions, ISO, Device that captured and Location details(If GPS is on in GPS Supported devices like Mobile,DSLR, etc..).
For Example, I have taken the below image from my mobile device with my GPS switched on and imported the same to my laptop.

To view the information that got captured: Right click on Image file.Click on properties, you will be able see like following screen.
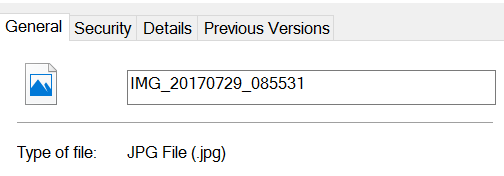
Now Click on the details Tab and scroll down to see the below details:
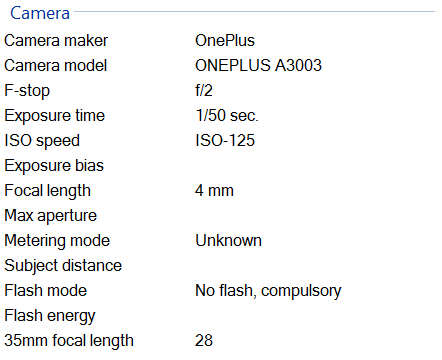
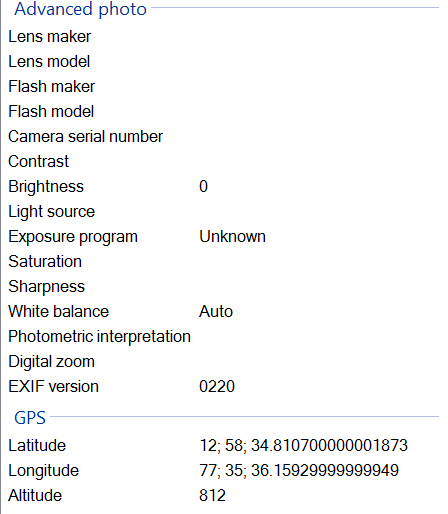
Now, we can extract this information from the image when it is uploaded into our Salesforce org. We can achieve this using the below procedures:
As part of this demo I am extracting Longitude, latitude and captured date from the picture and display in one field in Salesforce called ‘Description’ on File Object.But we can extract every element in the above attributes using EXIF Data.
Implementation:
First we should include a javascript EXIF library as a static resource. You can find the EXIF Library code in This File . Put this code in a text document and save it as ExifJavaScript.js file. à Upload that file as static resource with name ‘ExifJavaScript’ to use it in visualforce page.
Visualforce Page:
[sourcecode language=”java”]
<apex:page controller=”CreateSnap” standardStylesheets=”false” showHeader=”false”>
<apex:includeScript value=”{!$Resource.ExifJavaScript}”/>
<script> function getGPSdata(e) {
EXIF.getData(e.files[0], function() {
var obj = {};
obj.Latitude = EXIF.getTag(this, “GPSLatitude”);
obj.Longitude = EXIF.getTag(this, “GPSLongitude”);
obj.CreatedDate = EXIF.getTag(this,”DateTime”);
document.querySelectorAll(‘[id$=”desc”]’)[0].value = JSON.stringify(obj); });}
</script>
<div class=”container” style=”background-color:#E6E6FA”>
<div class=”row clearfix”>
<div class=”col-md-12 column”>
<div class=”jumbotron”>
<h1> Camera Access in Visualforce using HTML 5</h1>
</div>
<div class=”panel panel-warning”>
<div class=”panel-heading”>
<apex:form >
<apex:inputFile value=”{!cont.VersionData}” accept=”image/*;capture=camera” filename=”{!cont.Title}” onchange=”getGPSdata(this)”/>
<apex:inputTextarea value=”{!cont.description}” id=”desc” rows=”7″ cols=”25″ disabled=”true” >
<apex:commandButton StyleClass=”btn btn-danger” action=”{!saveFile}” value=”Save File” >
</apex:form></div>
</div>
</div>
</div>
</div>
</apex:page>
[/sourcecode]
Apex Class:
[sourcecode language=”java”]
public class CreateSnap{
public ContentVersion cont {get;set;}
public CreateSnap() {
cont = new ContentVersion();
}
public PageReference saveFile()
{
//PathOnClient is Mandatory
cont.PathOnClient = cont.title;
cont.Description = cont.Description;
//By default Origin value is “C” that means Content must be enabled in Org, so we need to explicitly set Origin as H
cont.Origin = ‘H’;
insert cont;
//redirect to path where file is saved
return new PageReference(‘/’+cont.id);
}
}
[/sourcecode]
We can use all tags available in the above JavaScript library by using following code in visualforce Page.
[sourcecode language=”java”]
<apex:includeScript value=”{!$Resource.ExifJavaScript}”/>
[/sourcecode]
We are calling this piece of javascript code from
[sourcecode language=”java”]
function getGPSdata(e) {
EXIF.getData(e.files[0], function() {
var obj = {};
obj.Latitude = EXIF.getTag(this, “GPSLatitude”);
obj.Longitude = EXIF.getTag(this, “GPSLongitude”);
obj.CreatedDate = EXIF.getTag(this,”DateTime”);
document.querySelectorAll(‘[id$=”desc”]’)[0].value = JSON.stringify(obj);
});
}
[/sourcecode]
The tags such as GPSLatitude, GPSLongitude, DateTime are available from the EXIFJavaScript file which has been included in this VisualForce page as a Static Resource.
We are Creating a variable called ‘obj’to store the data returned from the library. So, obj.Latitude, obj.Longitude, obj.CreatedDate contains the date we need.
The following line will find the Tag with Id named as ‘Desc’ and will store the data from that tag to the ‘Description’ field of ‘ContentVersion’ in our case.
[sourcecode language=”java”]
document.querySelectorAll(‘[id$=”desc”]’)[0].value = JSON.stringify(obj);
[/sourcecode]
For Uploading our image into salesforce I have used apex:inputFile. This will store the image file in VersionData Of ContentVersion Object.
[sourcecode language=”java”]
<apex:inputFile value=”{!cont.VersionData}” accept=”image/*;capture=camera” filename=”{!cont.Title}” onchange=”getGPSdata(this)”/>
[/sourcecode]
Whenever an image gets selected in this File our Javascript fuction will be called and we will get the data in the Description field of ContentVersion in JSON Format.
On clicking Save we are calling our Controller method to save Data in Back-end and redirection it our result screen as well.
Output:

Click on ‘Choose File’ to select the image.
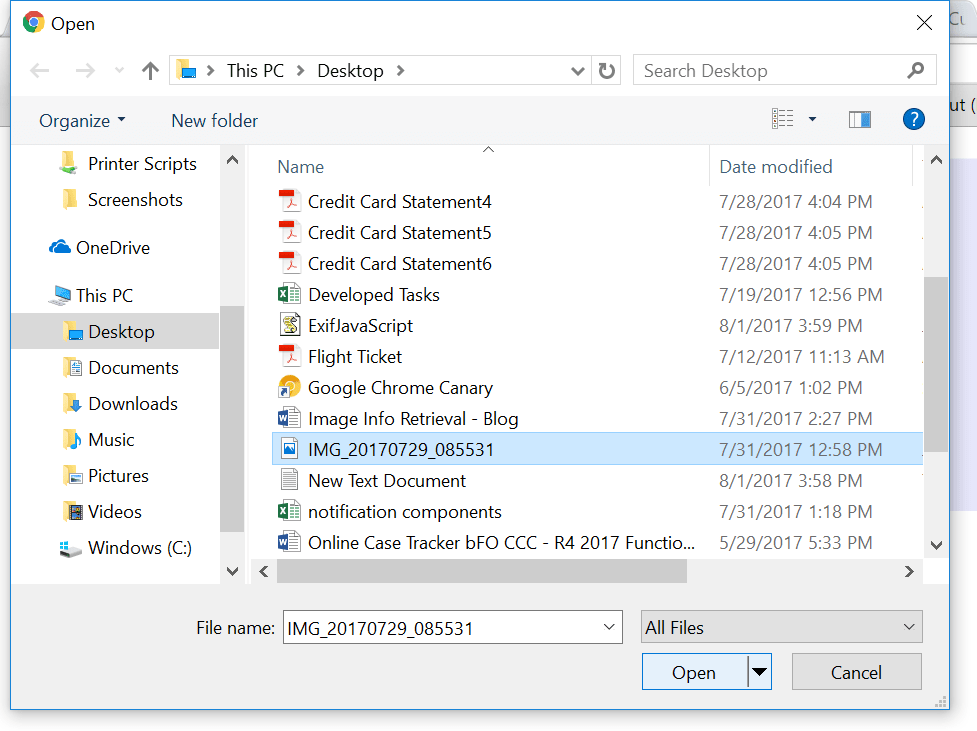
Click on Open to selected file
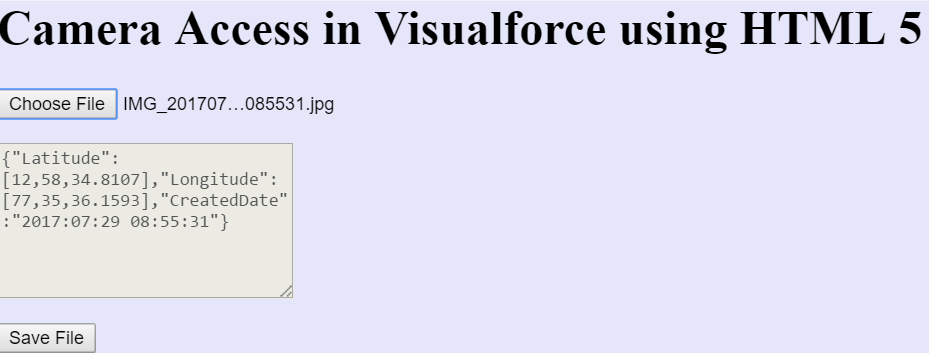
Click on ‘Save File’ to save image in backend and as well as storing the fetched information in description filed as follow.
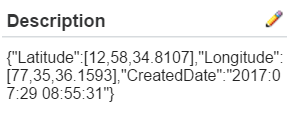
We are not restricted to only the few information shown above, we can get device information by using ‘Model’ tag and we can get comments added by the user who has created etc.
Use Cases:
- Helps to efficiently determine whether an image is genuine and authentic.
- Helps to track/verify work progress based on images
- Useful to organize and segregate photographs based on their location.
- If you have clicked a picture and later do not recollect where you had clicked it, it helps to easily find the location your picture was taken at.
Limitations:
1. Maximum view state size limit (135KB).
2. The maximum file size that can be uploaded via Visualforce is 10 MB.


