Multi-Factor Authentication (MFA) is a secure authentication method that requires users to prove their identity by supplying two or more pieces of evidence (or factors) when they log in. One factor is something the user knows, such as their username and password. Other factors include something the user has, such as an authenticator app or security key. By tying user access to multiple types of factors, MFA makes it harder for common threats, like phishing attacks and account takeovers, to succeed. You can use the free MFA functionality provided in Salesforce for all products built on the Salesforce Platform.
As we know that Salesforce is going to auto enable MFA for all the Salesforce users, and most of us are using the Salesforce authentication mobile app for login even though we have username and password to shield our data.
What Do I Need?
Setup of Multi Factor Authentication (For Admin Users)
To set up multi-factor authentication (MFA), follow the following steps
📝 Multi Factor Authentication has been enforced by Salesforce starting Spring ‘23 Release. Post release users will have a 30 day grace period during which they will be able to login by skipping the MFA authentication process.
Assign MFA to Users (using new Permission Sets)
📝 If MFA is already enabled in your org skip these steps.
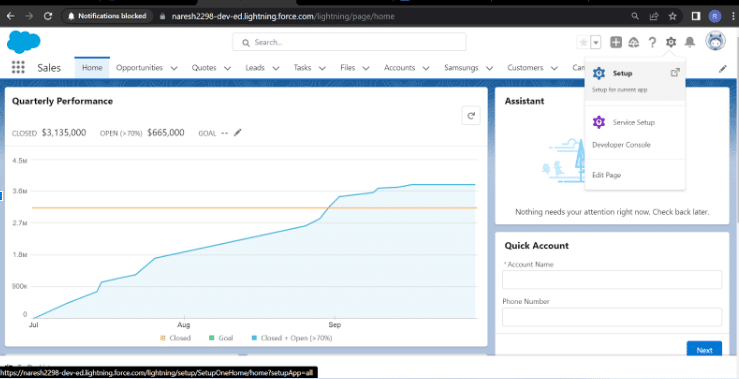
1) With Login into Salesforce
2) Click On The Gear Icon And Select Setup
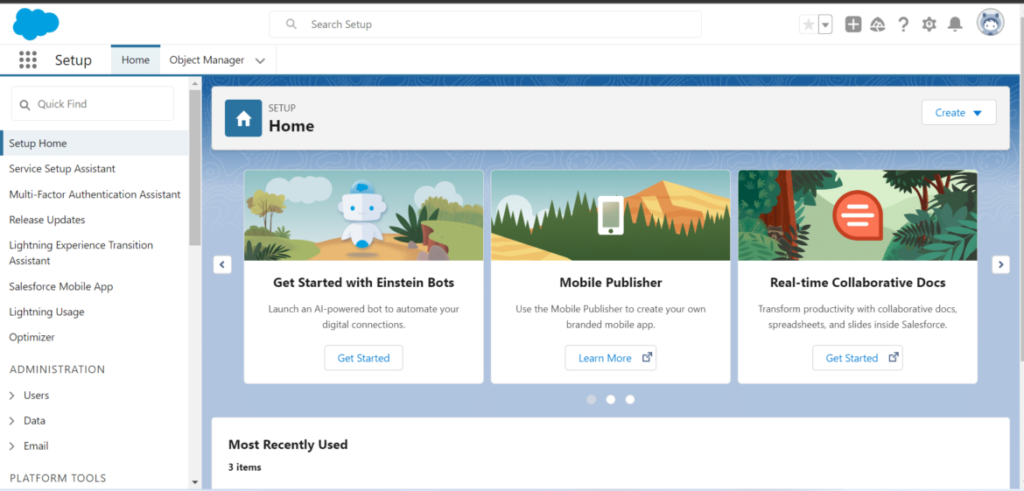
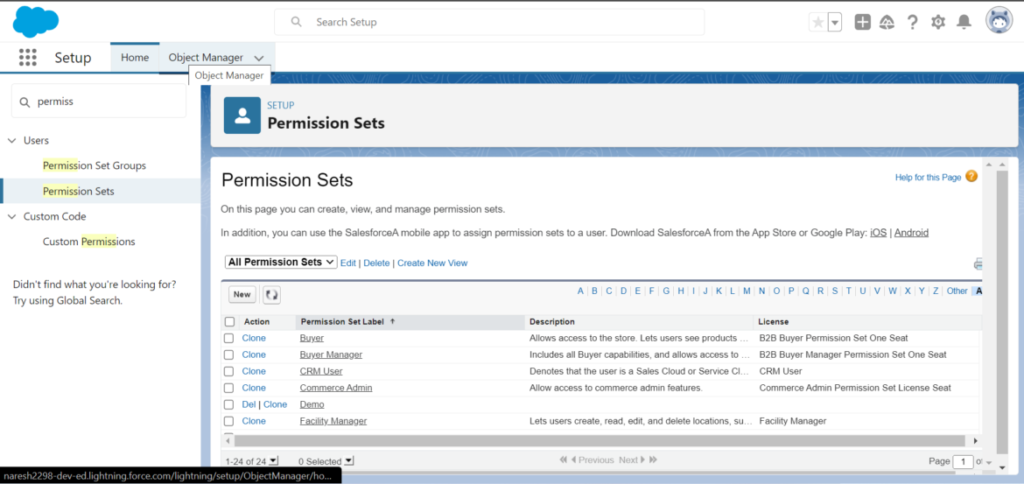
3) To create the Permission set for MFA, type ‘Permission Set’ in the quick find input box and Select the Permission set option
4) Create a new Permissions Set, Click on New button.
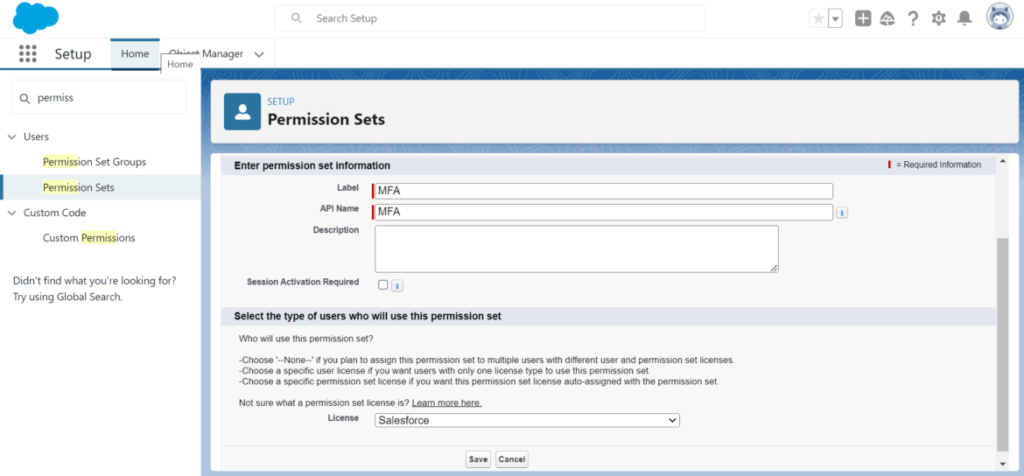
5) On the Permission Set Create page, create the Permissions set as follows:
- Label: MFA 📝 keep a name which is easy for other admin users to understand. As we are creating a permission for Multi-factor Authentication we are naming it as such.
- License: Salesforce
6) Click Save
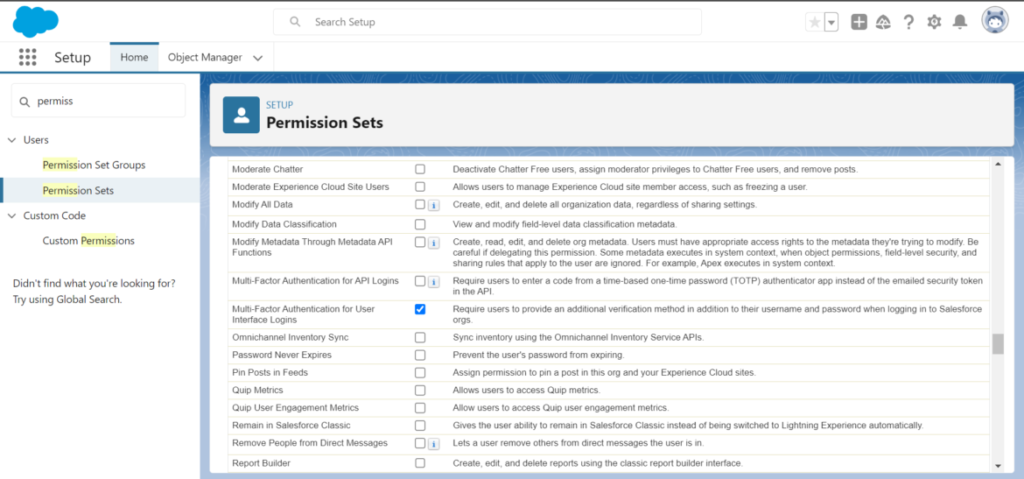
7) Once the permission set is created, navigate to the system permissions

8) Scroll to the “Multi-Factor Authentication for User Interface Logins” checkbox and check it
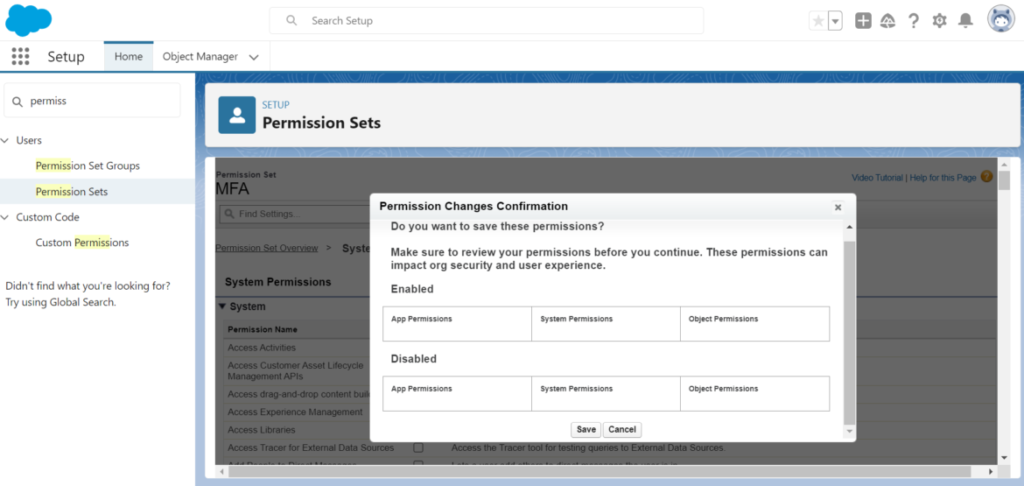
9) Scroll up to the Save button and Click Save
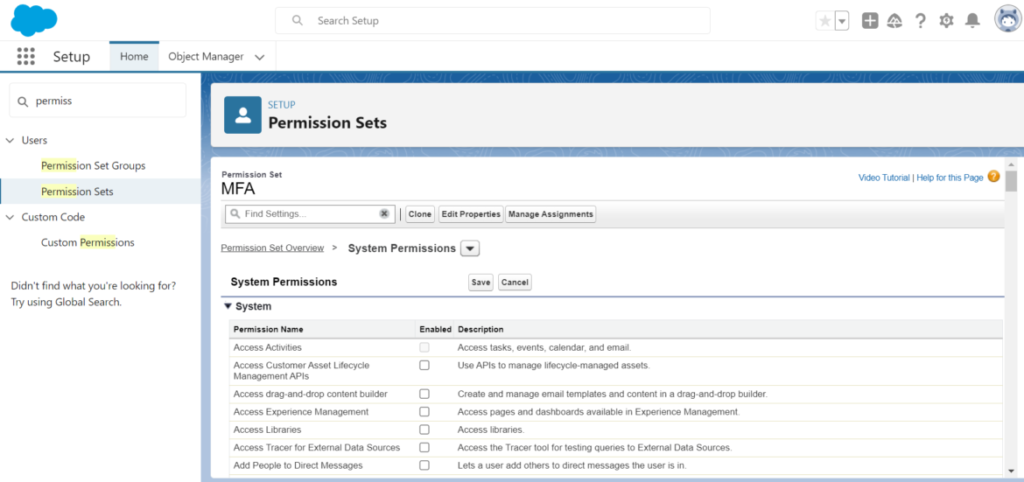
10) Permission Changes Confirmation window will be popped, click Save.
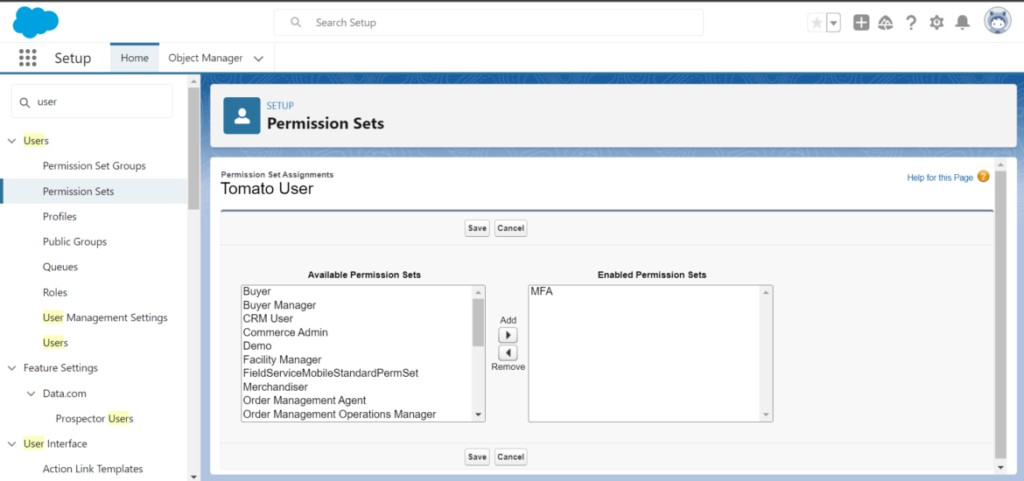
11) To add Permission Set to the User, enter User in the Quick Find and select Users.
12) Click on the User to whom you want to assign MFA,Click on Edit Assignment in the Permission Set Assignment,select the Permission set which was created above and click on Add.Click save.
Setup for Built in Authentication
- On your Salesforce instance click on the gear icon
- On the quick find box type in Session Setting and select the Session Setting option
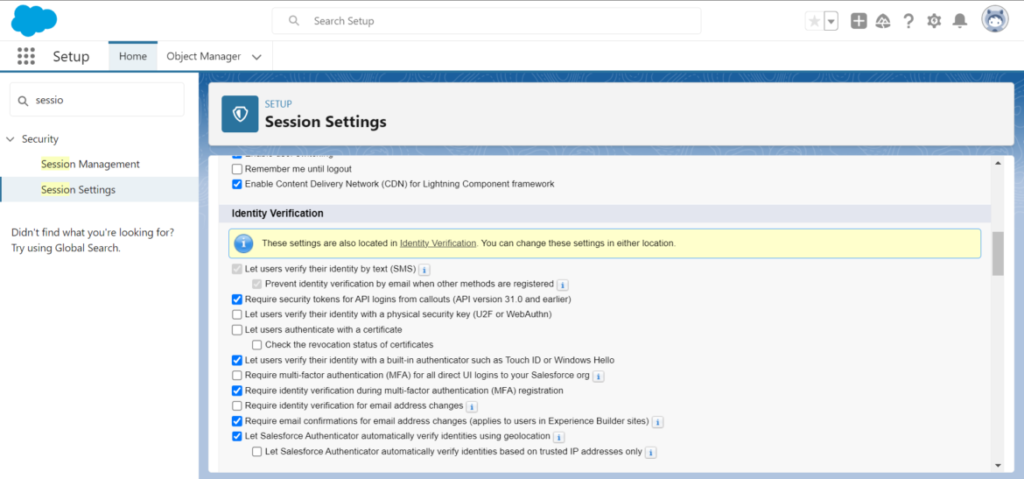
💬 Here check “Let users verify their identity with a built-in authenticator such as Touch ID or Windows Hello” checkbox in the Identity Verification section. Leave the remaining as is and Click on Save.
📝 This step helps ensure that the users have an option of configuring the Built In Authenticator from their system. To document this we are using Windows 11 Pro.
Setup of Multi Factor Authentication (For Non – Admin Users) – User had already logged into Salesforce
If user has already logged to the system via a different verification’s option
1) Once you have logged in
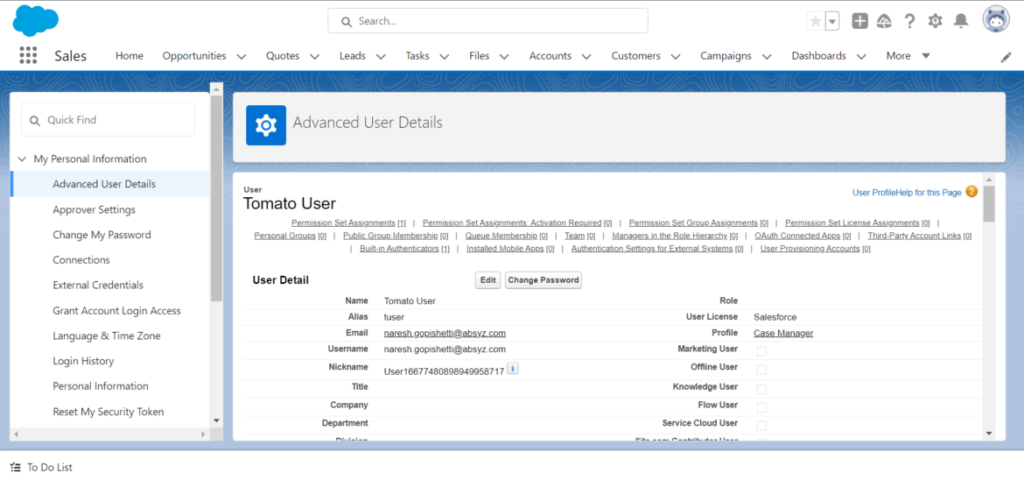
2) Click on the user icon and Click on the Settings option.
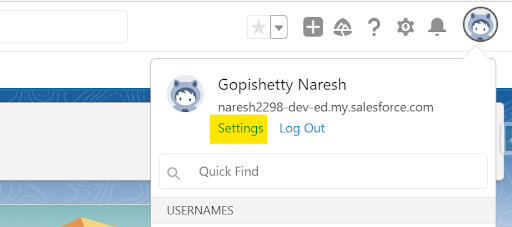
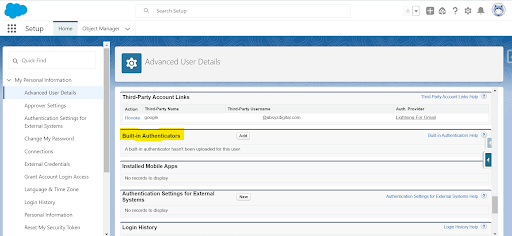
3) Click on the Advanced User Details.

4) Click on the Add in the Built-in Authentication section.
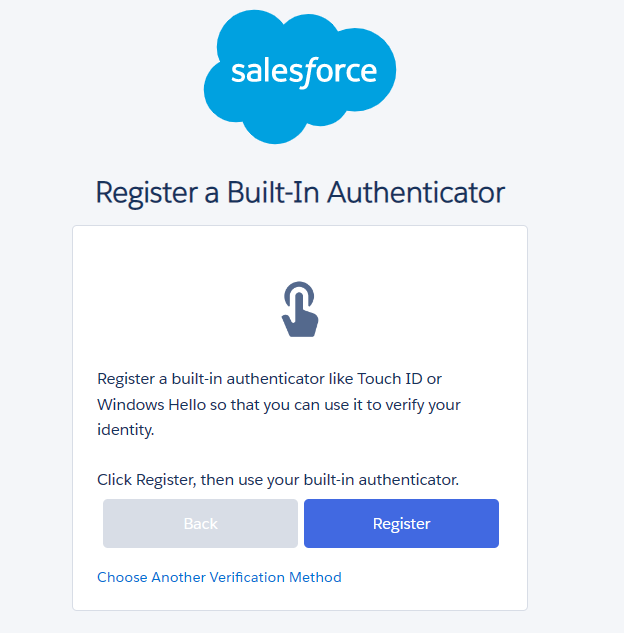
5) You should be redirected to a new tab to, “Verify Your Identity”. A verification code will be sent to the user’s email.

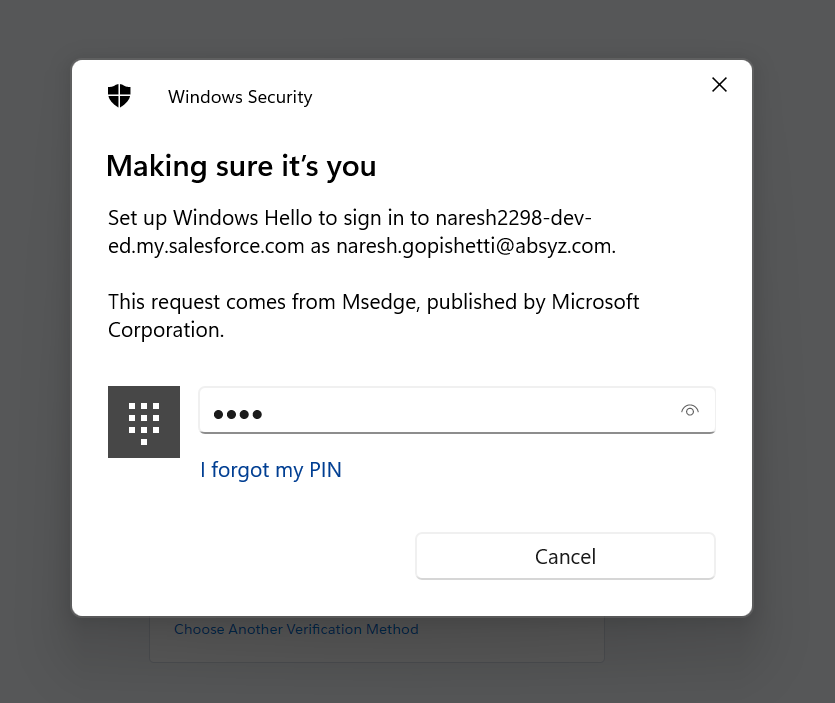
6) You will be redirected to the Register a Build-In Authentication page once the verification code has been validated. Click on the Register button to enter your system’s Windows Hello PIN.
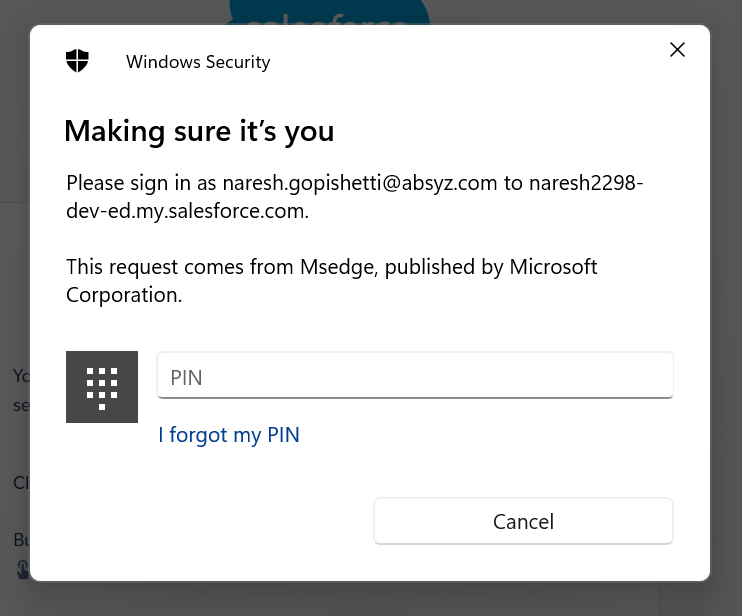
7) Enter the PIN – Click OK
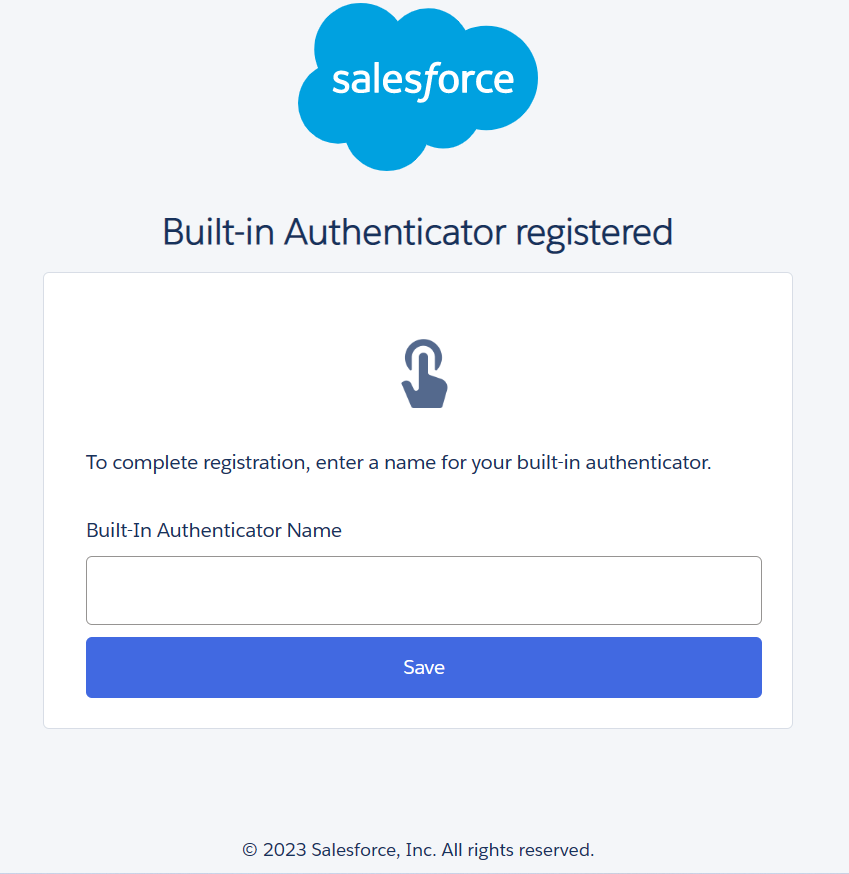
8) Redirected to the Build-in Authenticator registration page and entered the build-in authenticator name.
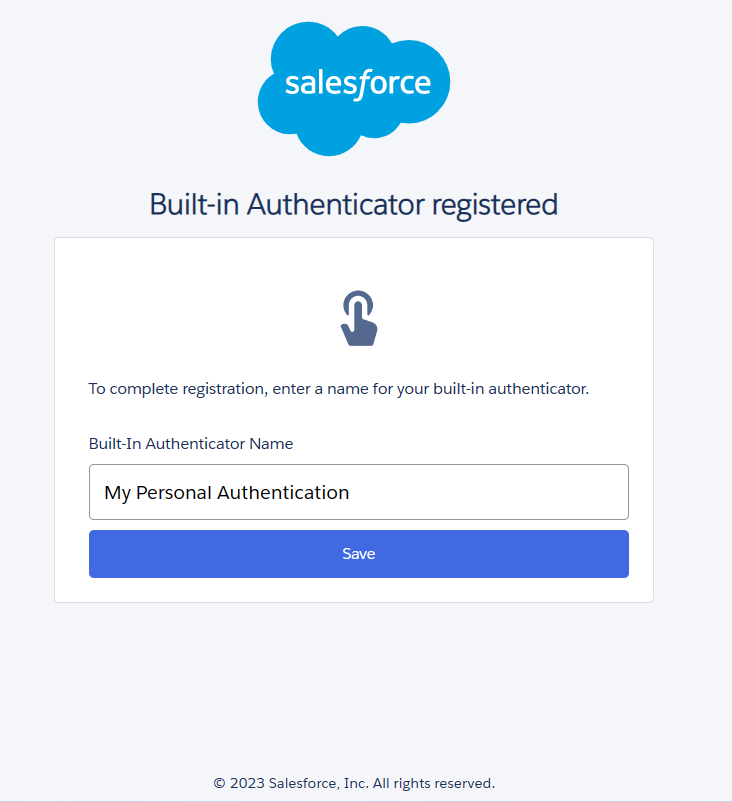
9) Click on Save
Once the above steps are completed the user will be able to use the the systems Built IN Authentication (PIN) as a verification mention for the login.
Setup of Multi Factor Authentication (For Non – Admin Users) – User has NOT logged into Salesforce yet.
1) When a user logs into the same Salesforce instance they add their credential and click on Login.

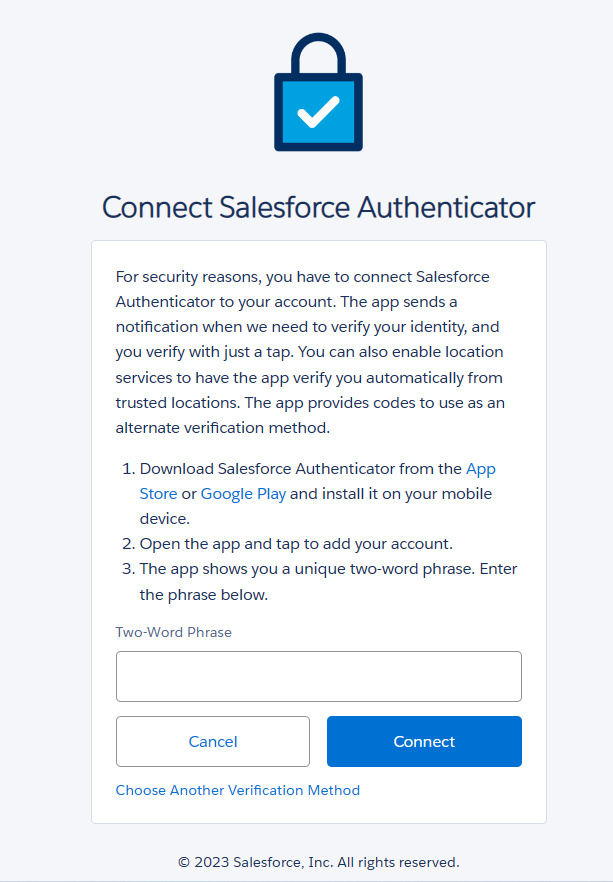
2) Upon login with correct credentials, as MFA for the same user is enabled, the user can view a Connect Salesforce Authenticator option on Screen. Click on the Choose Another Verification Method option.
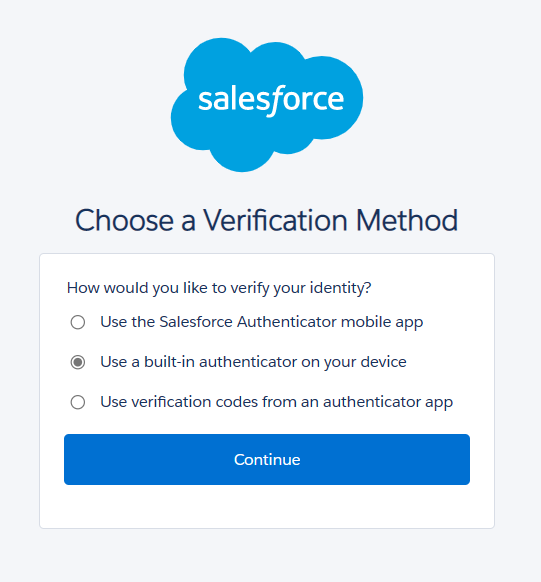
3) Choose “Use a build-in authenticator on your device” and click on continue.
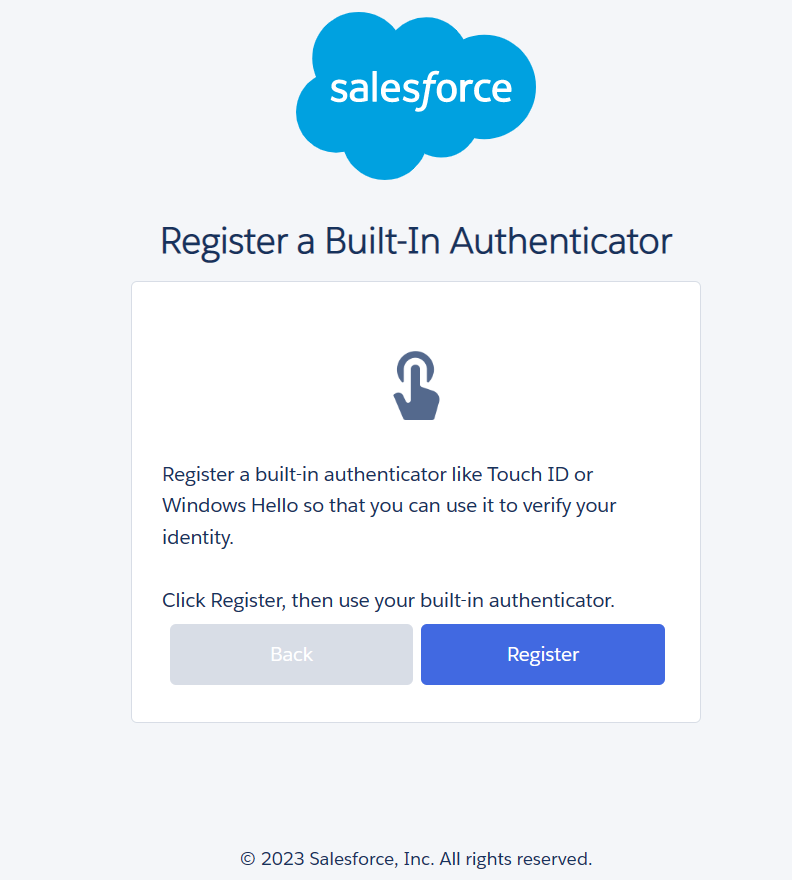
4) You will be redirected to the Register a Build-In Authentication page once the verification code has been validated.
5) Click on the Register button
6) Enter the Windows Hello PIN
7) You should be redirected to the Build-in Authenticator registration screen. Enter the build-in authenticator name.
Once done you should be logged into the Salesforce.
Login In Experience for user
The next time the user tries to login to the same salesforce instance and on the same PC.
1) Add the user credentials from login.salesforce.com or your specific org login domain.And click on Login.
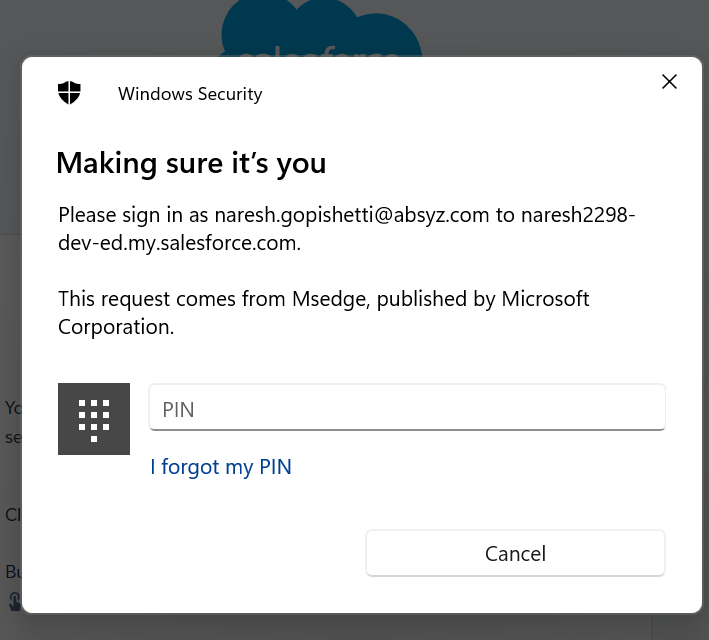
2) As you have already configured the Built In Authenticator you should get an option to Verify your Identity. Click on Verify.

3) Enter your Windows Hello PIN
Once done you should be logged into the salesforce.
Author: Naresh Gopishetti
Editor: Roopa Tatti