Introduction
The Salesforce B2C Commerce platform allows us to integrate various third-party services to create an amazing shopper experience. These include checkouts such as tax services,shipping, the payment process,product video repositories, and links to social media.
In Salesforce B2C Commerce Third-Party Integration, there is a B2C Commerce Web Service Framework and a B2C Commerce scheduled jobs interface. Both are available in the business manager. We can even use both, but which one to choose depends on the integration strategy. So let’s go through integration strategies first.

Synchronous Integration
Synchronous Integration happens in real-time, requests are processed immediately and the callout waits for the response to be returned, ensuring that the data is visible or updated immediately.
Asynchronous Integration
Asynchronous integration happens at a specific time, requests are processed at their own pace, but we will receive an acknowledgement that the request has been received, and the response will be sent once the processing is complete.
To implement asynchronous integrations,create a scheduled job for reusable steps or run the jobs manually to transfer data in or out of the B2C commerce platform.
Push
A CRM system pushes changes to customer data to B2C Commerce via the Data API.
Pull
B2C Commerce pulls an entire customer data file from a secure shell (SSH) file transfer protocol (SFTP) server.
Client-Side Vs Server-Side
The client side is the browser layer, and the B2C backend custom layer is on the server-side.
Most third-party tracking & tagging is done on the client-side. Some third-party systems provide direct client-side integration options like rating/reviews, captcha verification, and maps integration.
Server-side integration is used when you need a login/password or secret token to access a third-party service; you can also do it if you want to include third-party data in search indexes.
In this blog I’ll take you through step by step process on how to utilize the power of Web Services Framework for Salesforce B2C Commerce Third-Party Integration,
Web Service Framework
B2C Commerce pulls an entire customer data file from a secure shell (SSH) file transfer protocol (SFTP) server.
The Salesforce B2C commerce Web Services framework offers the best defense in keeping third-party integrations up, running and stable. In Web Services Framework, we can enable or disable services, which is not possible with direct calls outside the Web Services Framework.
Here’s what the Web Services framework user interface looks like.
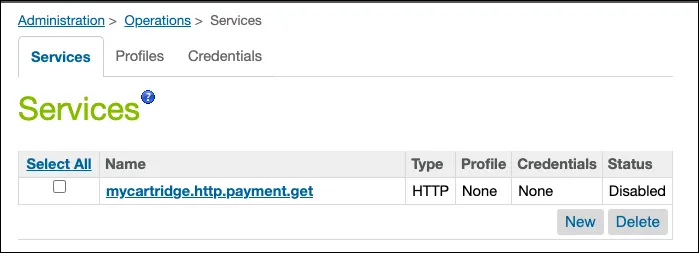
Step involved in creating Web Service,
Step 1 – Create Web Service Credentials
Step 2 – Configure Web Service Profiles
Step 3 – Configure Web Service
Step 4 – Code a web service.
Step 5 – Set up logging
Note : To access Business Manager, you must have a B2C Commerce implementation. If you don’t, that’s OK. Read along to learn how to take these steps in a staging instance.
Create Web Service Credentials
B2C Commerce uses web service credentials for basic authentication. Here’s how to specify credentials.
1) Open Business Manager.
2) Select Administration > Operations > Services.
3) Click the Credentials tab.
4) Click New.
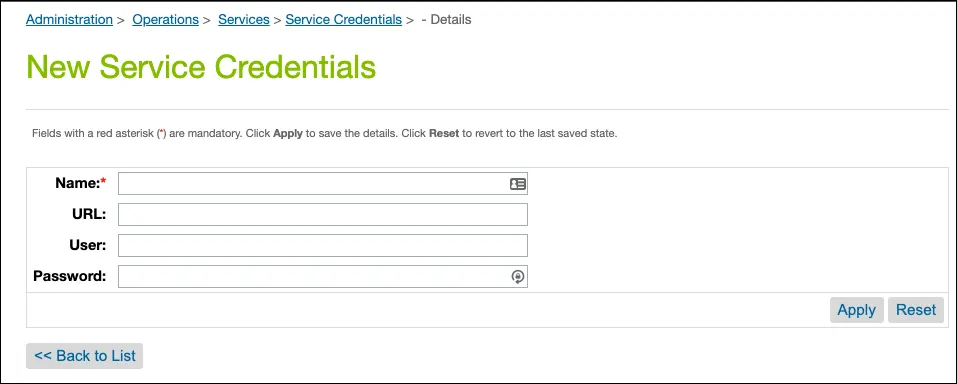
5) Enter a name for the credential. For example : test.mycartridge.http.partner
6) Don’t include spaces or user/password details.
7) Enter the URL to the service, including the protocol. For example: http://51.134.145.10
8) Enter the username and the password for the credential.
Click Apply.
Note: The password is masked after typing it and can’t be retrieved from the Business Manager. Store the value securely elsewhere.
Create a Web Service Profile
1) Open Business Manager.
2) Select Administration > Operations > Services.
3) Click the Profiles tab.
4) Click New.
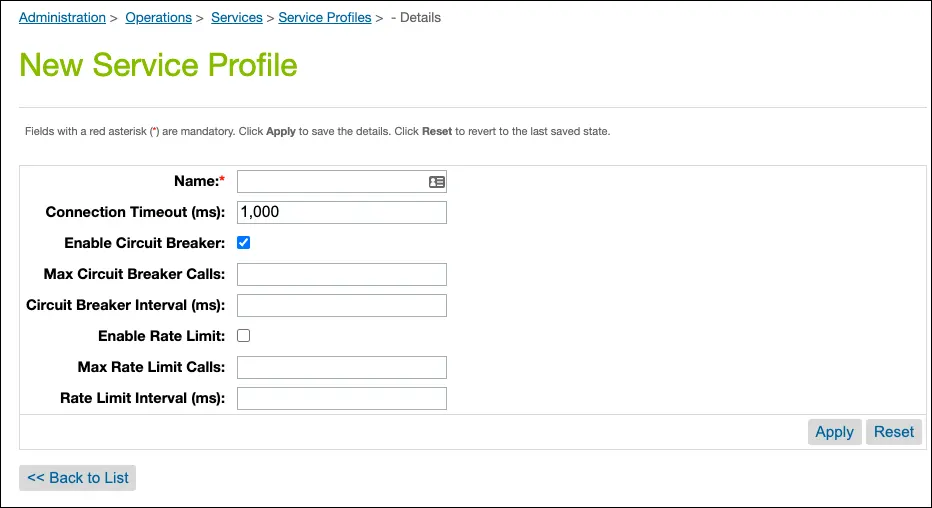
5) Enter the profile name.
6) Enter the number of milliseconds for the client connection timeout: 1,000
7) Select Enable Circuit Breaker and enter the number of calls that must fail to trigger the circuit breaker. A circuit breaker suspends calls to web service if triggered.
8) Select Enable Rate Limit and enter the maximum number of calls that B2C Commerce makes in a certain time interval.
Creating Web Service
Here’s how we do it,
1) Open Business Manager.
2) Select Administration > Operations > Services.
3) Click New.
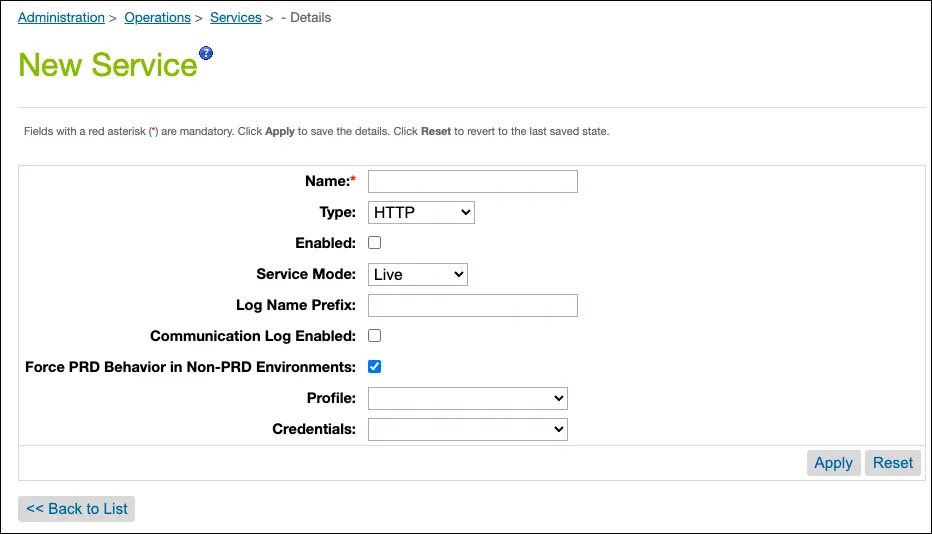
- Select Live to make calls to a live web service.
- Select Mocked to use the mocked call configured in your service registry to simulate the expected response from the web service.
- Enabling this on a non-production instance, communication logs are disallowed unless you configure a filter.
- Disabling this on a non-production instance, communication logs are allowed regardless of whether a filter is configured.
- No effect on production instances.
Customize a Web Service
Steps to customize a web service,
- Create a script
- Implement SOAP or WS-Security.
- Create a custom attribute.
- Use a Web Reference.
Create a Script
The general approach to coding a web service for a B2C Commerce storefront is to write a script for a RESTful web service and to store credentials or certificates in Business Manager.
- The web service script needs to import the dw.svc package.
- Make a HTTP/SFTP call based on the requirements.
- If you intend to implement SOAP or Web Services Security (WS-Security) features , write a script that uses the dw.ws package class.
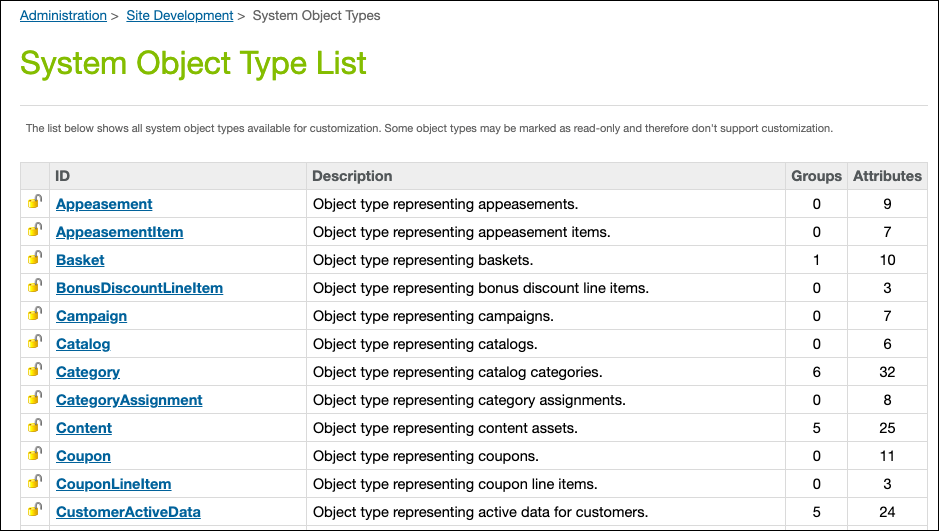
Create a Custom Attribute
We can customize web service configurations, credentials, and profiles by adding a Custom Attribute to the respective system object.
1) Open Business Manager.
2) Select Administration > Site Development > System Object Types.
3) Click the name of the object you want to edit. For example : Service Config, Service Credential, or Service Profile.
4) Click the Attribute Definitions tab.
5) Click New.
6) Enter a unique ID, display name, and value type.
7) If you change the language or type, you must confirm the change before it’s applied. Click Apply.
8) Add information for the fields required by the data type you selected and click Apply.
We can code a web service using this new attribute.
Use a Web Reference
- Web reference allows us to access a resource over the internet using an internet protocol such as SOAP or HTTP.
- We can use webreference2 class, within the Salesforce B2C Commerce APIs,it represents a web service defined in a WSDL file.
Set Up Logging
Generated logs can be viewed in Business Manager (Administration > Site Development).
B2C Commerce logs messages to a custom log category with a format. For example : service.serviceName.type
type is one of the following,
- Head – After every service call , logs a message indicating success or failure.
- Comm – After every service call, logs data passed to the underlying transport and the response received from it.
- Log – Logs miscellaneous messages, such as service initialization and error traces.
Open Commerce API (OCAPI)
OCAPI enables developers to work with all the resources (such as baskets, customer data, and products) that they used with the Commerce APIs, but via HTTP requests and responses. Each HTTP resource is addressed by its unique URL. Data is transported using request or header parameters, or within the request body as a JSON document with a defined structure.
OCAPI is a REST API where the client initiates the transfer of representations of the server state.
OCAPI includes three types of RESTful APIs.
| API type | Application |
| Shop API | Allows a client to interact with the system as a shop customer, an agent shopping on behalf of a customer, or a mobile app |
| Data API | Gives create/read/update/delete access to system resources such as with enterprise relationship management (ERP) or middleware |
| Meta API | Used to retrieve a formal description of the Open Commerce API, including custom attributes |
OCAPI HTTP method supports GET, PUT, DELETE, POST, PATCH along with, HEAD -Similar to a GET, but returns headers only, and not content (body). The headers are identical to those in a GET.
OPTIONS -Lists the supported HTTP methods for the specified URL in the Allow header. It’s not cache-able and returns no content.Salesforce Commerce API (SCAPI)
The Salesforce Commerce API’s a collection of RESTful APIs for interacting with B2C Commerce instances. It goes by a few different names: B2C Commerce API , the acronym SCAPI, or just Commerce API.
SCAPI consists of two main groups of APIs, Shopper APIs and Admin APIs,
| Shopper APIs | Admin APIs |
| Used by shoppers or trusted systems acting on their behalf | Used by administrators or other privileged users |
| Access secured by the Shopper Login and API Access Service (SLAS) | Access secured by Account Manager |
| Supports anonymous users and multiple authentication methods | Authentication is handled exclusively by Account Manager |
| Read only (exceptions: Shopper Baskets and Shopper Orders) | Read and write |
| Designed for high-scale usage | Designed for moderate usage |
| API names start with “Shopper” | No naming convention |
| Includes: Shopper Baskets, Shopper Customers, Shopper Orders, Shopper Products and 7 more | Includes: Assignments, Catalogs, Customers, Inventory Availability, Orders, Products, and 8 more |
Conclusion
The Salesforce B2C Commerce platform is all about integrating various third-party services to create an amazing shopper experience.
When it comes to Salesforce B2C Commerce Third-Party Integration each B2C Commerce merchant and project has a unique set of requirements. It’s critical that you fully understand each integration interface and can summarize data inputs and outputs in all cases.That means coming up with a strategy and applying best practice principles along the way. While an effective integration strategy can improve data flow for the entire implementation, the application of key integration principles can help produce a more scalable and stable application.