
Swift UI is an expressive UI framework for macOS, tvOS, iOS, watchOS, iPadOS that allows you to design and develop user interfaces with way less code and in a “Declarative way”
SwiftUI lets you ignore Interface Builder (IB) and storyboards without having to write detailed step-by-step instructions for laying out your UI
Getting Started
Lets start from scratch
1. We need Xcode To Start the process (If you have it continue with step 2
else Install ‘XCode’ from the App Store )
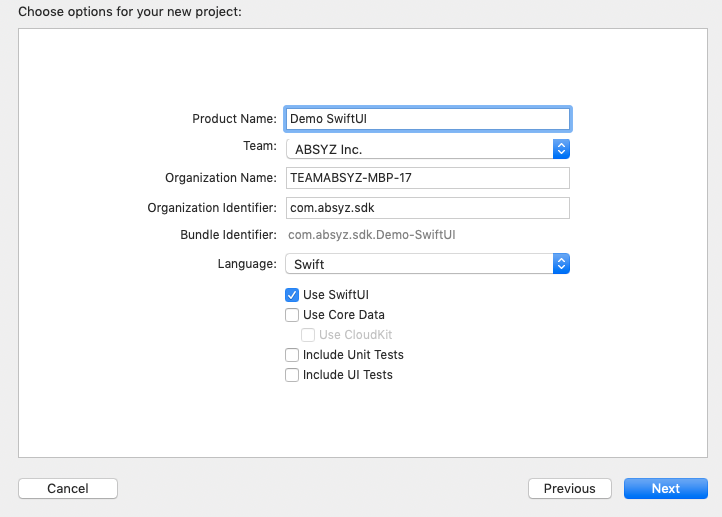
2. Create a new XCode project,
3. Under iOS select single View App,
4. Make sure at the bottom Swift UI option is checked, else it ill generate storyboard file
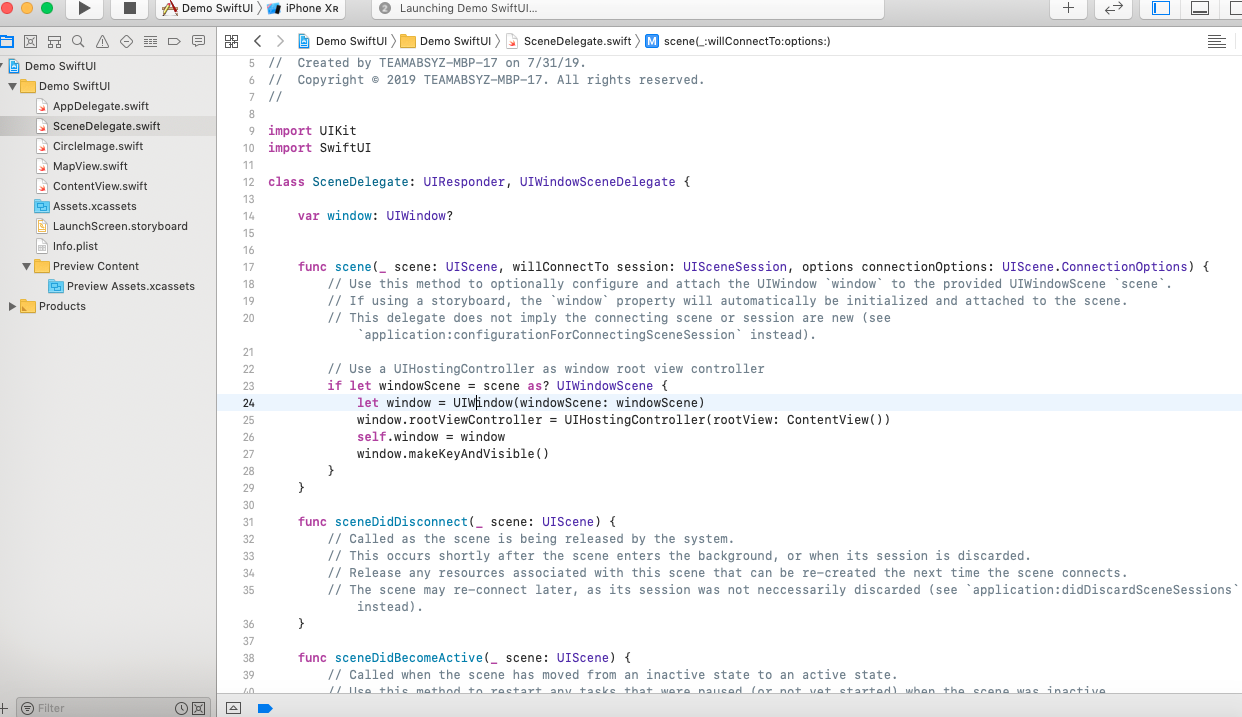
5. Now XCode will generate a file called contentView.swift and the old App delegate.swift is now split into
AppDelegate.swift and
SceneDelegate.swift
SceneDelegate is not specific to SwiftUI but this line is:
window.rootViewController = UIHostingController(rootView: ContentView())
SwiftUI is declarative: You declare how you want the UI to look, and SwiftUI converts your declarations into efficient code that gets the job done
You won’t be writing hundreds of lines of code to create views
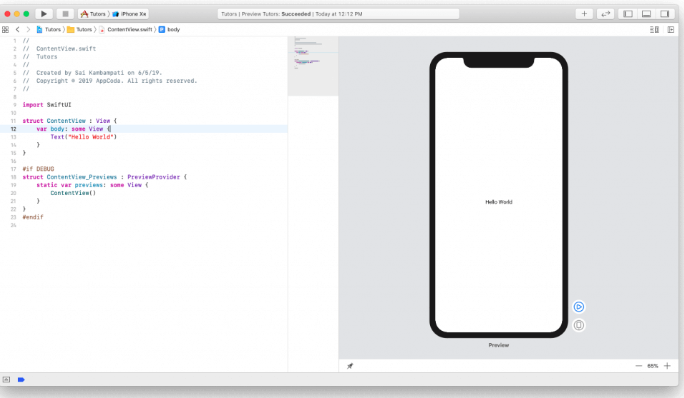
6. //Basic go through of the code
Import Swift UI
Struct ContentView: View{
Var body : some view {
Text(“Hello SwiftUI”)
}
#IF DEBUG
Struct ContentView_Preview :PreviewProvider {
Static var previews : someview{
ContentView()
}
}
#endIf
7. The tags #If DEBUG, #endIf are the directives which run only in debug mode by default
And when you are ready with the package for deployment to upload to the Appstore it is gonna go from debug to production mode so it is not going to run
These are used to control what you want to see in the preview
Import Swift UI
Struct ContentView: View{
Var body : some view {
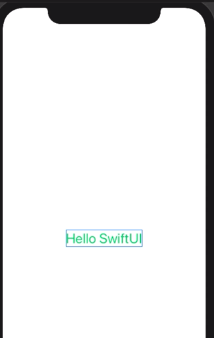
Text(“Hello SwiftU”).font(.title).foregroundColor(.green)
}
#IF DEBUG
Struct ContentView_Preview :PreviewProvider {
Static var previews : someview{
ContentView()
}
}
#endIf
1.If we want to have Vertical views we have the concept called VStack
2.If we want to have Horizontal views we have the concept called HStack
3.Reflecting Font, FontStyles, FontColors to the Text is uncomplicated by appending a method successive to Text
Import Swift UI
Struct ContentView: View{
Var body : some view {
VStack{
Text(“Turtle Rock”).font(.title).color(.green)
Text(“Joshua Tree National Park”).font(.subheadline)
}
}
}
#IF DEBUG
Struct ContentView_Preview :PreviewProvider {
Static var previews : someview{
ContentView()
}
}
#endIf
Text Views
Import Swift UI
Struct ContentView: View{
Var body : some view {
VStack(alignment :.leading)
{
Text(“Turtle Rock”).font(.title).color(.green)
HStack{
Text(“Joshua Tree National Park”).font(.subheadline)
Text(“California”).font(.subheadline)
}
}.padding()
}
}
#IF DEBUG
Struct ContentView_Preview :PreviewProvider {
Static var previews : someview{
ContentView()
}
}
#endIf
ImageView
import SwiftUI
struct CircleImage: View {
var body: some View { Image(“SwiftUI”).clipShape(Circle()).overlay(Circle().stroke(Color.white,lineWidth: 2)).shadow(radius: 10)
}
}
#if DEBUG
struct CircleImage_Previews: PreviewProvider {
static var previews: some View {
CircleImage()
}
}
#endif
MapView
Create another controller for map view
import SwiftUI
import MapKit
struct MapView: UIViewRepresentable {
func makeUIView(context:UIViewRepresentableContext) -> MKMapView{
MKMapView()
}
func updateUIView(_ uiview :MKMapView, context :UIViewRepresentableContext)
{
let coordinate = CLLocationCoordinate2D(latitude:34.011286 ,longitude :-116.166868)
let span = MKCoordinateSpan(latitudeDelta :2.0,longitudeDelta :2.0)
let region = MKCoordinateRegion(center :coordinate ,span:span)
uiview.setRegion(region , animated:true)
}
}
#if DEBUG
Struct MapView_Previews: PreviewProvider {
static var previews: some View {
MapView()
}
}
#endif

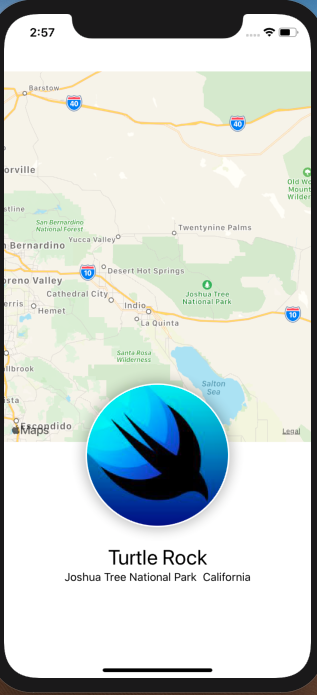
ContentView
import SwiftUI
struct ContentView: View {
var body: some View {
VStack{
MapView().frame( height:CGFloat(300)).edgesIgnoringSafeArea(.top)
CircleImage()
.offset( y: CGFloat(-130)).padding(.bottom, CGFloat(-130))
VStack()
{
Text(“Turtle Rock”).font(.title)
HStack{
Text(“Joshua Tree National Park”).font(.subheadline)
Text(“California”).font(.subheadline)
}
}.padding()
}
}
}
#if DEBUG
struct ContentView_Previews: PreviewProvider {
static var previews: some View {
ContentView()
}
}
#endif
Output:
Prerequisites:
Swift 5, iOS 13, XCode 11
References:
https://www.hackingwithswift.com/quick-start/swiftui/how-to-create-static-labels-with-a-text-view
https://www.raywenderlich.com/3715234-swiftui-getting-started
UP NEXT :
MIGRATION OF UI TO SWIFTUI