When we have to upload multiple files or attach many files to any record, Salesforce provides storage limit per user license purchased. It varies from edition to edition. So, sometimes organisations decide to use external storage service like Amazon S3 cloud.
User can be given option to upload files to Amazon S3 via Salesforce and access them using the uploaded URLs. REST protocol is used in this scenario.
Files will be uploaded securely from Salesforce to Amazon server. After create your AWS (Amazon Web Service) user account, login secret and key ID will be shared with you by Amazon. This will be used to login to S3 Cloud from Salesforce.
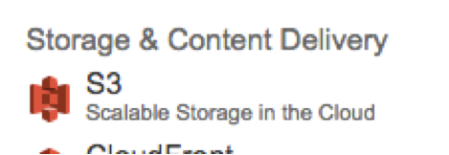
After logging in to AWS, you can go to console screen and click on S3 under Storage & Content Delivery section.
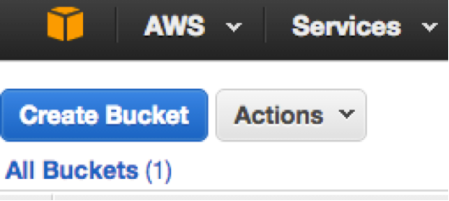
You can create a bucket where the files will be uploaded.
You can not create folders inside bucket, but a logical folder using ‘/’ slash can be created.
We will see here everything in action:
[sourcecode language=”java”]
public void uploadToAmazonS3 (Attachment attach, String folderName) {
String filename = folderName+’/’ + attach.Name;
String attachmentBody = EncodingUtil.base64Encode(attach.Body);
String formattedDateString = DateTime.now().formatGMT(‘EEE, dd MMM yyyy HH:mm:ss z’);
String bucketname = //you can write the bucket name where files should be uploaded
String host = //aws server base url
HttpRequest req = new HttpRequest();
req.setMethod(‘PUT’);
req.setEndpoint(‘https://’ + bucketname + ‘.’ + host + ‘/’ + filename);
req.setHeader(‘Host’, bucketname + ‘.’ + host);
req.setHeader(‘Content-Length’, String.valueOf(attachmentBody.length()));
req.setHeader(‘Content-Type’, attach.ContentType);
req.setHeader(‘Connection’, ‘keep-alive’);
req.setHeader(‘Date’, formattedDateString);
req.setHeader(‘ACL’, ‘public-read-write’);
Blob blobBody = EncodingUtil.base64Decode(attachmentBody);
req.setBodyAsBlob(blobBody);
}
[/sourcecode]
Create a REST request and set the headers as mentioned.
host can be region specific server ‘s3-ap-southeast-1.amazonaws.com’ or the generic ‘s3.amazonaws.com’.
The request needs to be equipped with proper authentication so that it reaches securely at correct endpoint. To achieve this, Amazon provided login secret and key ID will be used and an authorization string will be created. Authorization string will contain an encrypted signature.
[sourcecode language=”java”]
String key = XXXXXXXXXXXXXXXXXXXX
String secret = XXXXXXXXXXXXXXXXXXXXXXXXXXXXX
String stringToSign = ‘PUTnn’ + attach.ContentType + ‘n’ + ‘/’ + bucketname + ‘/’ + filename;
Blob mac = Crypto.generateMac(‘HMACSHA1’, blob.valueOf(stringToSign), blob.valueof(secret));
String signed = EncodingUtil.base64Encode(mac);
String authHeader = ‘AWS’ + ‘ ‘ + key + ‘:’ + signed;
[/sourcecode]
The above authorization string needs to be passed as a header to the http request. And then make the REST send the request.
[sourcecode language=”java”]
req.setHeader(‘Authorization’, authHeader);
Http http = new Http();
HTTPResponse resp;
resp = http.send(req);
[/sourcecode]
The response status code of 200 means a successful upload.
Now, the bucket needs to be configured as a website. The objects (files uploaded) should be made publicly readable, so that the same URL using which the file is uploaded can be used to access the files publicly. To do so you need to write a bucket policy that grants everyone “s3:GetObject” permission.
You can go to http://awspolicygen.s3.amazonaws.com/policygen.html
and create a policy. Follow the below steps to create the policy.
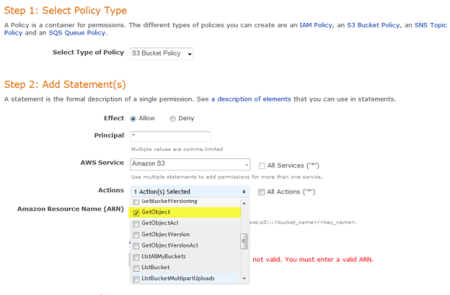
Principal: *
Set the Amazon Resource Name (ARN) to arn:aws:s3:::<bucket_name>/<key_name>
Add your bucket above and <key_name> is set to *.
Click on Add Statement and then Generate Policy. Copy the JSON script generated.
To provide you an example how does the policy looks, I have created a bucket policy script.
[sourcecode language=”java”]
{
“Version”: “2012-10-17”,
“Id”: “Policy1463490894535”,
“Statement”: [
{
“Sid”: “Stmt1463490882740”,
“Effect”: “Allow”,
“Principal”: “*”,
“Action”: “s3:GetObject”,
“Resource”: “arn:aws:s3:::bucket_name/*”
}
]
}
[/sourcecode]
Then open the bucket you created, go to properties. Click on Add Bucket Policy, when the popup opens, paste the script generated and save. This will make the files uploaded in the bucket publicly accessible.