
In recent times, AWS S3 has been the focus for people looking to store large volumes of files. This blog focuses on using Microsoft’s Azure Blob storage to do the same.
In essence, Azure Blob storage has a very similar structure to S3. You need to start with creating a storage account. Inside the account there need to be containers, which is like a bucket in S3. Inside the container is where you will be storing your files. For our purpose we will using a type of blob called Block blob.
Folder structure is logical – exactly like in S3.
Configuring Azure Blob is straightforward:
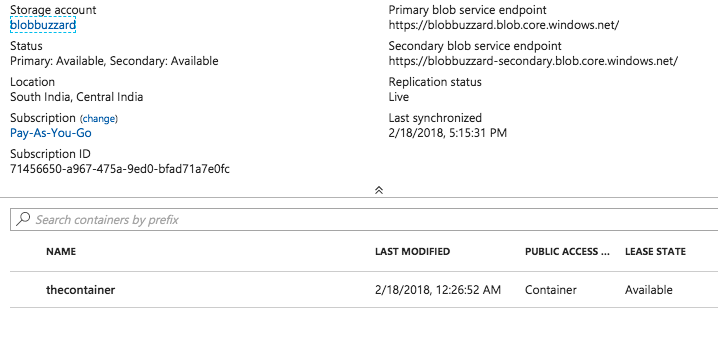
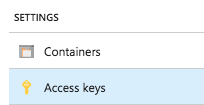
You should note down the Storage Key from here:
We will discuss the Shared Key method of authentication here. Shared Key Authentication to Azure Blob also uses a signature calculation like S3. We need to create a signature string and calculate the hash. There is a version that needs to be specified for calculation of signature. The version decides the format of the signature. Here, we are using the version called ‘2015-12-11’.
Exact details of authentication mechanism here
The timestamp needs to be formatted as below using the formatGMT method in Datetime class:
timestamp.formatGMT('EEE, dd MMM yyyy HH:mm:ss z');
Make sure to URL encode the file name:
fileName = EncodingUtil.urlEncode(fileName, 'UTF-8');
The file length has to be converted to string:
fileLength = String.valueof(fileLength);
This is what the canonicalized headers should look like:
canonicalHeader = 'x-ms-blob-type:BlockBlobnx-ms-date:'+timestamp+'nx-ms-version:2015-12-11n';
This is what the canonicalized resource should look like:
canonRes = '/'+wrapRec.storageName+'/'+containerName+'/'+wrapRec.fileName;
The final string that will need to be signed using HMAC256
stringToSign = 'PUTnnn'+fileLength+'nn'+fileType+'nnnnnnn'+canonHeaders+canonRes;
Sign the request using the combination of storage key and the signature:
Blob temp = EncodingUtil.base64Decode(StorageKey);Blob hmac = Crypto.generateMac('hmacSHA256', Blob.valueOf(stringToSign), temp);Blob.valueOf(stringToSign), temp);signature = EncodingUtil.base64Encode(hmac);
After this, its a matter of creating the HTTP request:[sourcecode language="java"]
req.setMethod('PUT');

req.setHeader('x-ms-blob-type', 'BlockBlob');

req.setHeader('x-ms-date', timestamp);

string authHeader = 'SharedKey '+storageName+':' + signature;

req.setHeader('Authorization', authHeader);

req.setHeader('x-ms-version', '2015-12-11');

req.setHeader('Content-Length', fileLength);

req.setHeader('Content-Type', fileType);

req.setEndpoint('https://'+storageName+'.blob.core.windows.net/'+container+'/'+fileName);

req.setBodyAsBlob(fileBody);
[/sourcecode]
Make sure that anonymous access is enabled on your container, so that you can access the file from a link. The link to the uploaded file will be something like:
https://’Storage Name’.blob.core.windows.net/’Container name’/’File Name’
Now this was Apex. When uploading a file from the Apex server side, you will always be limited by the Governor limits imposed like the Size of the HTTP request and the Heap size, which means low size of the uploads you can do from Apex.
Although Azure does not have a specific library for javascript, it’s node.js library can be converted to a javascript library for usage on a page. The details are here.
So if you want to do the upload on a html page, you will need to generate a library from the latest node.js build. For our purpose, we need to generate and use 2 js libraries: the Azure common library and the Azure Blob library. Follow the instructions in the link above to generate them.
Once generated, the library can be directly used as static resources. The great thing about the library is that you do not need to explicitly calculate the signed string, all of the steps that we had to do with apex is handled by the library.
When the Azure Common library is loaded, you have an object call AzureStorage available in the script. This object has the functions that will be used to instantiate the Blob service as an object.
AzureStorage.createBlobService(storage.storageName,

storage.storageKey);
After that use related functions to perform your task.
listBlobsSegmented
– returns a list of all the blobs in the storage.
createBlockBlobFromBrowserFile
– Creates a blob from a file on the page.
There are many other functions available. The javascript library has the same functions available as the Azure node.js library.
Sample usage below:
[sourcecode language="java"]
function uploadFile() {

var file = document.getElementById('theFile').files[0];

var customBlockSize = file.size > 1024 * 1024 * 32 ? 1024 * 1024 * 4 : 1024 * 1024 * 1;

blobService.singleBlobPutThresholdInBytes = customBlockSize;

if (blobService) {

speedSummary = blobService.createBlockBlobFromBrowserFile(

container,

file.name,

file,
{
blockSize: customBlockSize
},
function(error, result, response) {
finishedOrError = true;
if (error) {
document.getElementById("response").innerHTML = JSON.stringify(error);
} else {
alert("uploaded !");
}
});
}
}
[/sourcecode]
The full code for the Apex and Visualforce is here.