Apple announced CoreML framework for the machine learning
The idea behind the CoreML framework is to get the trained machine learning data which is usually is the format .ml model and integrate with any app using coreML framework. We can drag those models in to the project and start using those models using CoreML framework.We will train the data using CreateML framework in swift.
Create ML
Create ml is a machine learning framework in swift which is used to train the data.Advantage is it is used within Apple Ecosystem without any Third Party service
Create ML has following features:
1.A simple approach for training the model using images, texts, and tabular data.
2.Machine learning models can be created using Xcode Playground, Swift, and native Apple framework.
3.Create ML models can be easily integrated into apps, just by drag and drop.
4.Create ML is powered by Mac and its available to use from macOS Mojave.
Train the data
As we mentioned that it is used within the apple ecosystem
open Xcode -> Developer Tools -> CreateML
Upon launch, you’ll be presented with a dialog to open an existing project (of which you’ll have none) so simply select File ->New Project to present the following screen
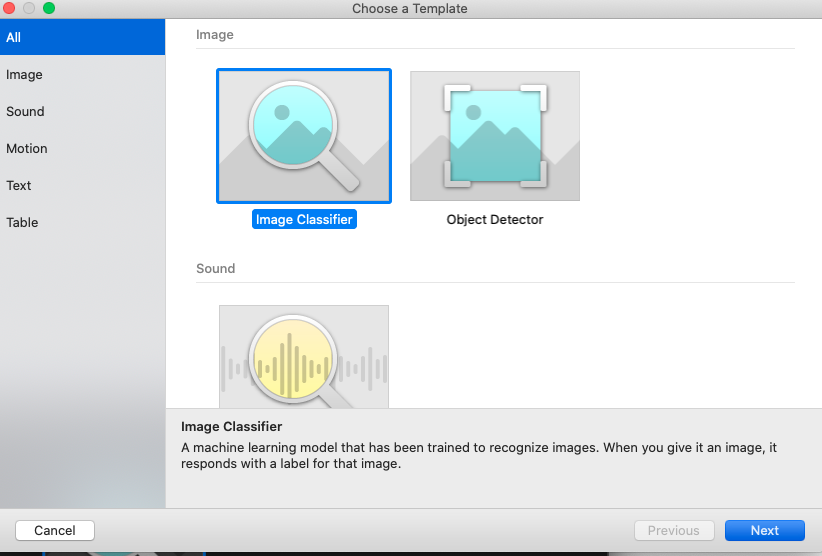
we will look into training a model which tells about a picture so, select Image Classifier and click Next and name the project
and collect the images, create folders respectively and keep all of them in one folder and train using Create ML
for example :-
1.Collect all related Chairs images create a folder for chairs and put all the chair images in the chair folder
2.Collect all the related Bottles and create a folder for bottles and put all the bottle images in the bottle folder
3.Collect all the Bags and create a folder for bags and put all the bag images in the bag folder etc.
and put Chair folder, Bottle folder, Bag folder all in one folder name it as a Train folder
Drag the Train folder which contains the folder’s of Chair, Bottle,Bag and drop it in the Training section in Create ML tool
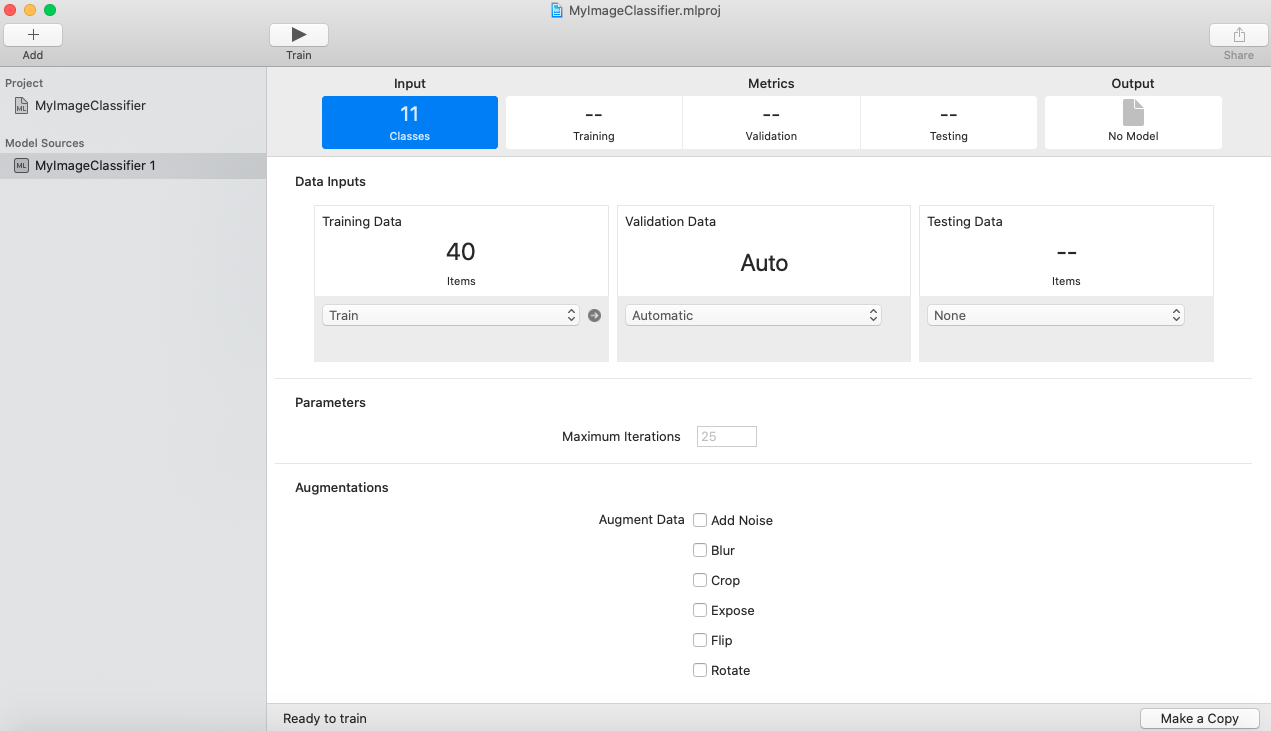
Now Train the model to show the metrics on validating the data
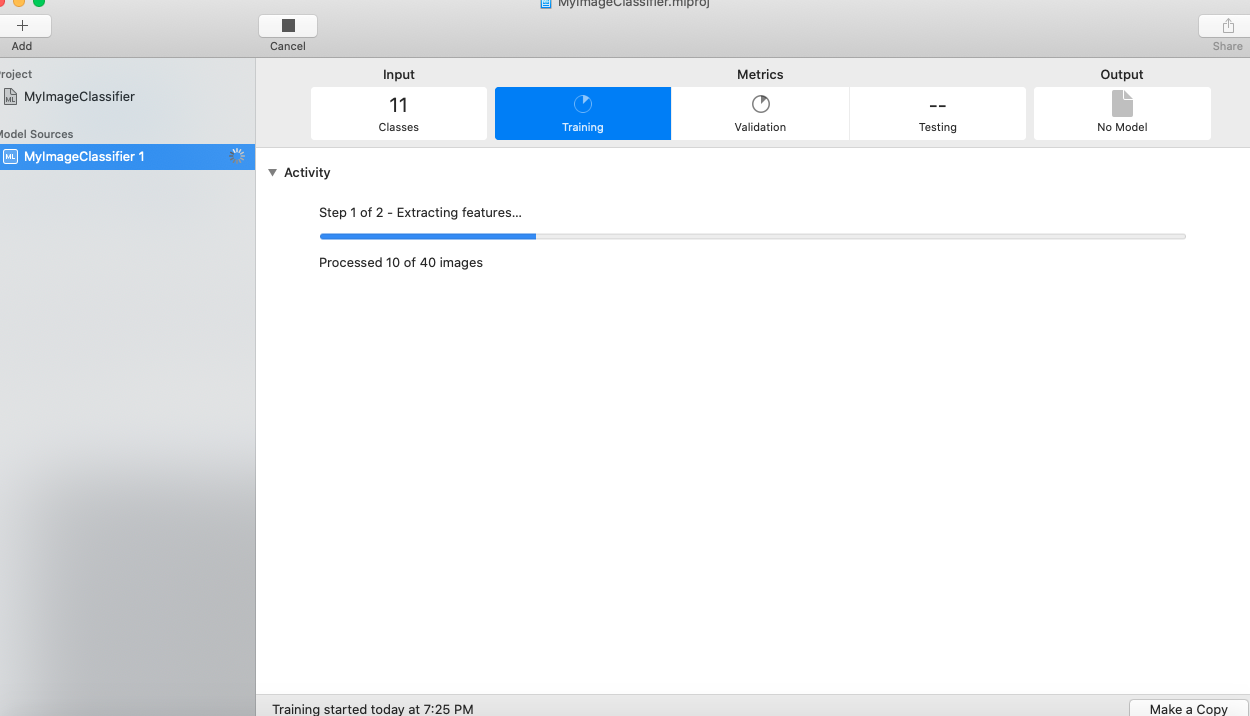
the Metrics after training the data be shown like
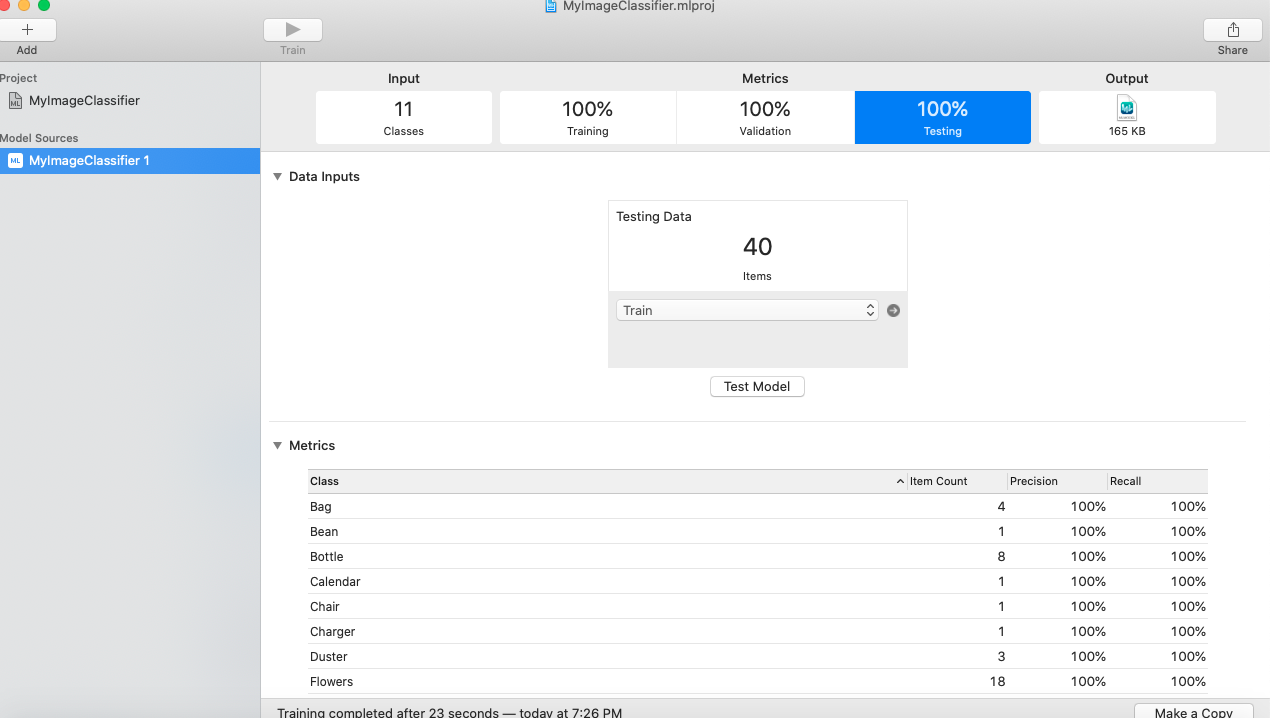
Now drag the output file on to desktop, Now that our .mlmodel file is ready.
Lets create an example Xcode project
1.open Xcode -> File -> New -> Project
2.Select Single View App
3.Name the project
4.Create the project
5.Now drag the .mlmodel file from the desktop
6.Select Copy file if needed
7.select create folder references
8.Add the appropriate target
9.click finish
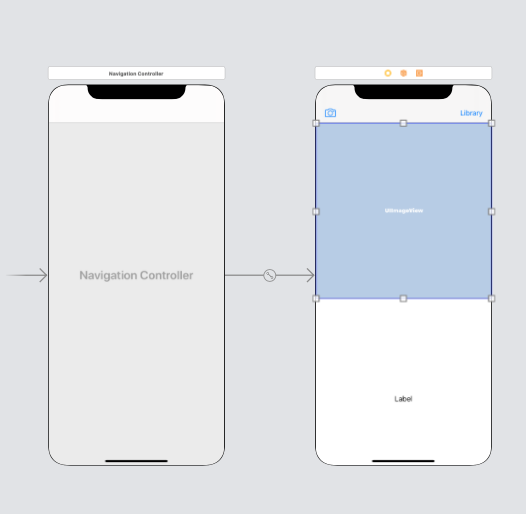
Now open Main.storyboard
1.Create two UIButtons one for camera and one for Library(to get the images)
2.And add an UIImageView
3.And add a UILabel
4.Assign view controller to the storyboard
The storyboard looks like
5.Import CoreML
6.Import Vision
7.Open ViewController.swift file and create the outlets for the labels, buttons, and UIImageView and add the button actions for camera and library
6.In the camera button action
copy the following code
@IBAction func cameraAction(_ sender: Any) { if UIImagePickerController.isSourceTypeAvailable(.camera){
let image = UIImagePickerController()
image.delegate = self
image.sourceType = UIImagePickerController.SourceType.camera
image.allowsEditing = false
self.present(image,animated: true)
}
}
7.In the library button action
copy the following code
@IBAction func libraryAction(_ sender: Any) {
if UIImagePickerController.isSourceTypeAvailable(.photoLibrary){
let picker = UIImagePickerController()
picker.allowsEditing = false
picker.delegate = self
picker.sourceType = .photoLibrary
present(picker, animated: true)
}
}
8.Add the following code
func imagePickerControllerDidCancel(_ picker: UIImagePickerController) {
dismiss(animated: true, completion: nil)
}
func imagePickerController(_ picker: UIImagePickerController, didFinishPickingMediaWithInfo info: [UIImagePickerController.InfoKey : Any])
{
guard let image = info[.originalImage] as? UIImage else {return}
imageView.image = image
classifier.text = "Analyzing Image..."
dismiss(animated: true, completion: nil)
detectImageContent()
}
func detectImageContent() {
guard let model = try? VNCoreMLModel(for: TrainImageProject_1().model) else {
fatalError("Failed to load model")
}
let request = VNCoreMLRequest(model: model) {[weak self] request, error in
guard let results = request.results as? [VNClassificationObservation],
let topResult = results.first
else {
fatalError("Unexpected results")
}
DispatchQueue.main.async { [weak self] in
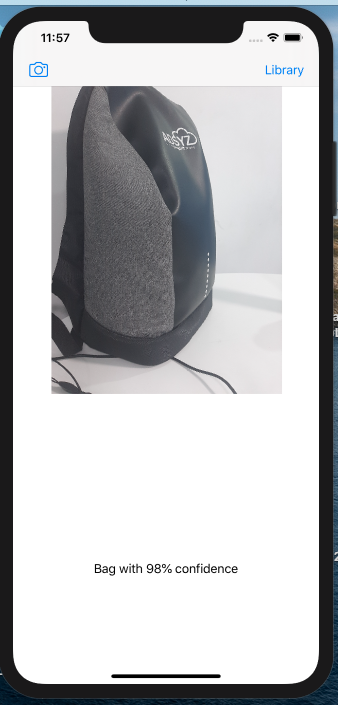
self?.classifier.text = "(topResult.identifier) with (Int(topResult.confidence * 100))% confidence"
}
}
let imageIt = imageView.image!
guard let ciImage = CIImage(image:imageIt )
else { fatalError("Cant create CIImage from UIImage") }
let handler = VNImageRequestHandler(ciImage: ciImage)
DispatchQueue.global().async {
do {
try handler.perform([request])
} catch {
print(error)
}
}
}
The result looks like