This blog post helps you to integrate Microsoft Outlook with Salesforce by using Lightning for Outlook sync by OAuth 2.0 connection method and create Custom Objects data from outlook.
Set Up Lightning for Outlook in the Microsoft Outlook
For setting up of Outlook connection to salesforce, please follow the below blog from points 1-9 to setup the users in outlook who needs to have sync with Salesforce.
Lightning for Outlook and Lightning Sync from Salesforce
- Enter Outlook Integration and Sync in the quick find box
- Enable Outlook Integration and Lightning Sync.
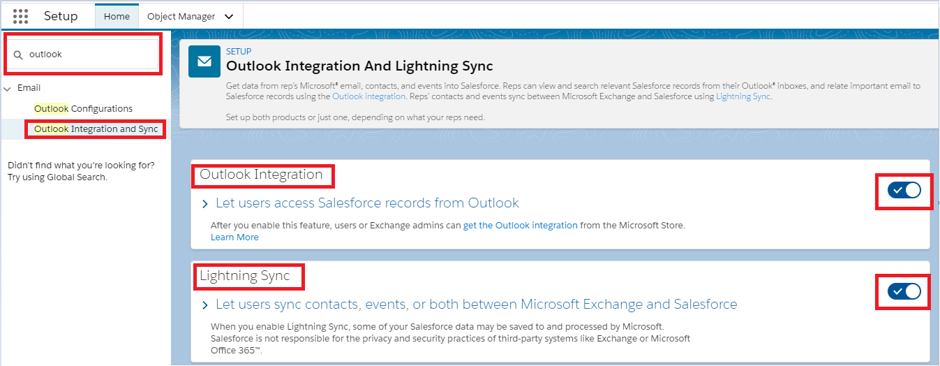
- Expand the Lightning Sync section after enabling it. You could see two types of connection methods.
- OAuth 2.0
- Service account
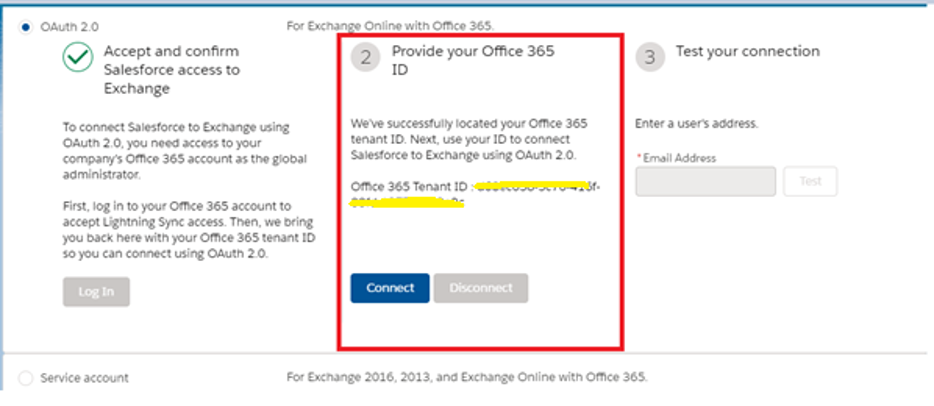
Select the OAuth 2.0 and click on Log in Button.
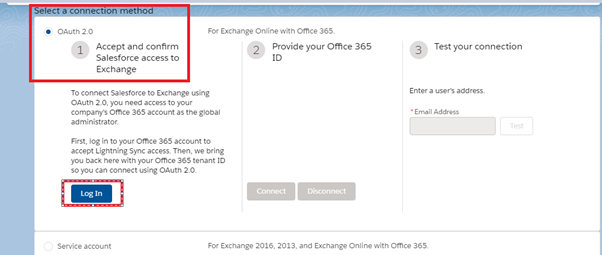
Once you click on Login button, It will automatically redirect to outlook login page.
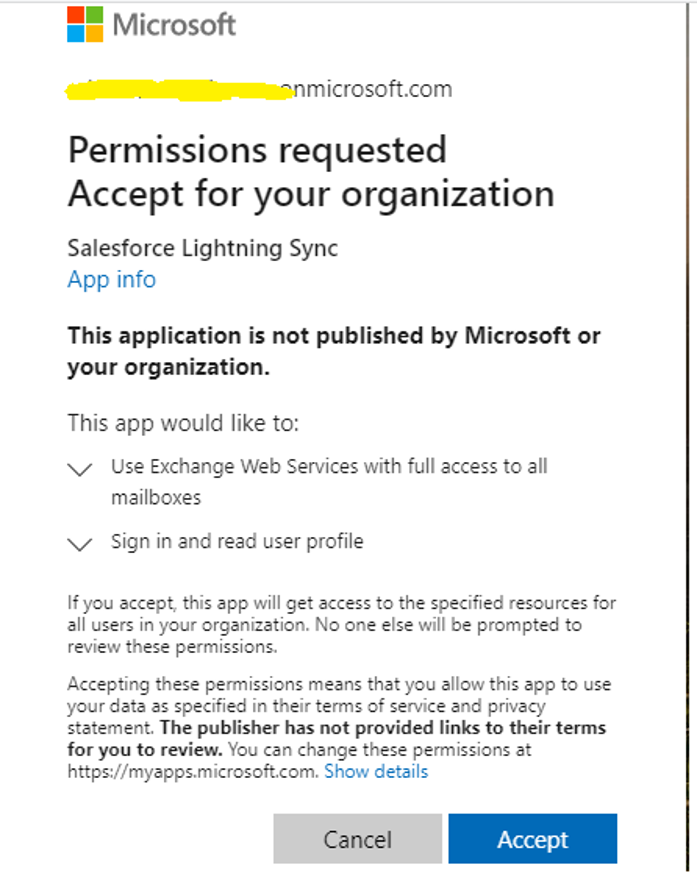
Enter the details of Global admin User of Microsoft Account and click on Accept.
The connection gets accepted and we will be getting the Office 365 Tenant ID automatically which is shown in below screenshot.
Click on Connect. The connection gets authorised and ready for testing the user connection with Outlook.
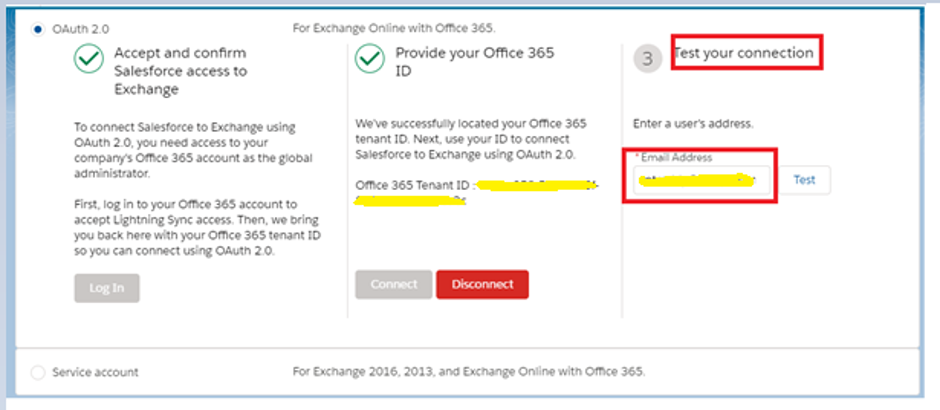
Enter the user’s email address whose email is same in both the systems (Salesforce & Outlook) in the Test your connection prompt.
Click on test after entering the email address. This will verify with Outlook server and enables a secure connection between both the systems.
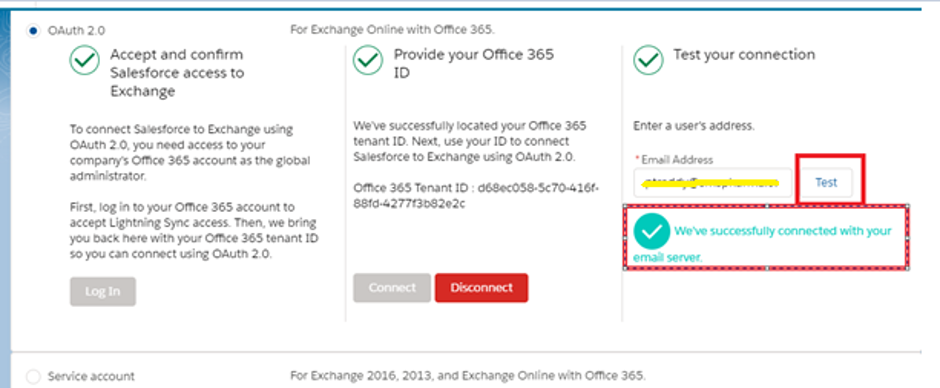
Now we have successfully connected with email server, so the exchange happens between both the systems.
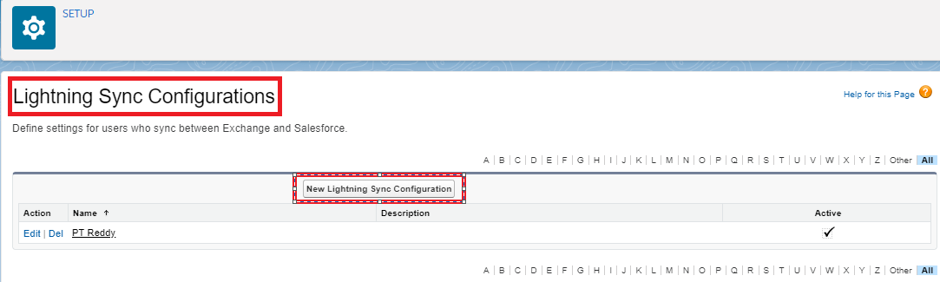
Define the sync settings and click on Go to Configs

Define lightning sync configurations.
Click on New lightning sync configurations and give the exchange behaviour as shown below.
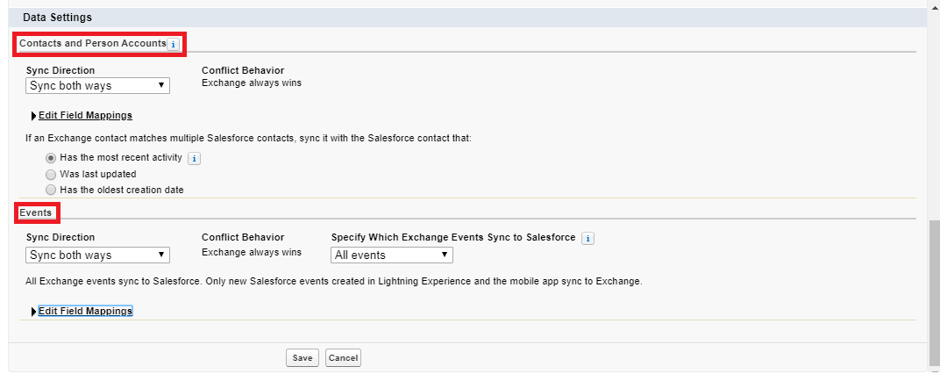
Click on Save.
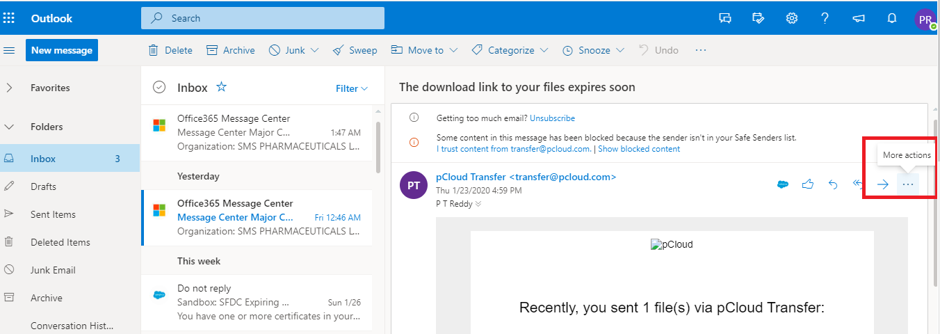
Outlook Connection Establishment:
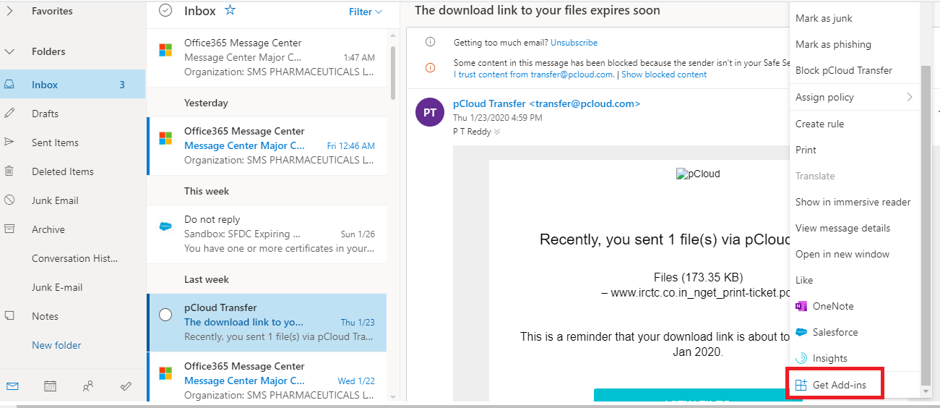
Open your Outlook mailbox and click on mail and you can find more actions on right side.
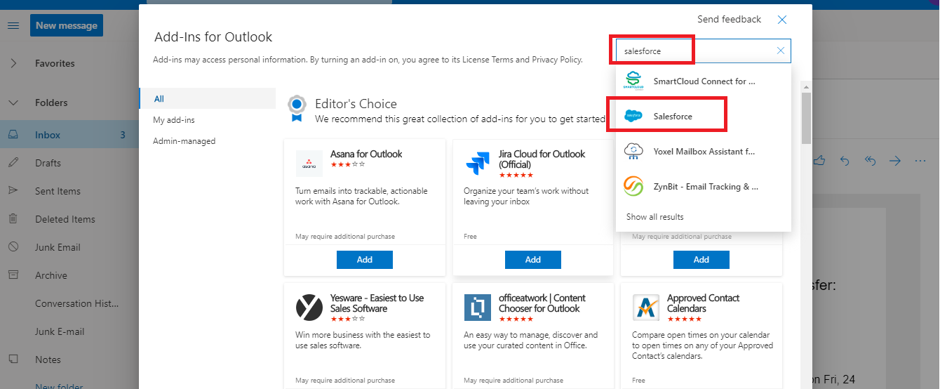
Click on Get Add-ins.
From the search bar you can search for salesforce add in and add to outlook.
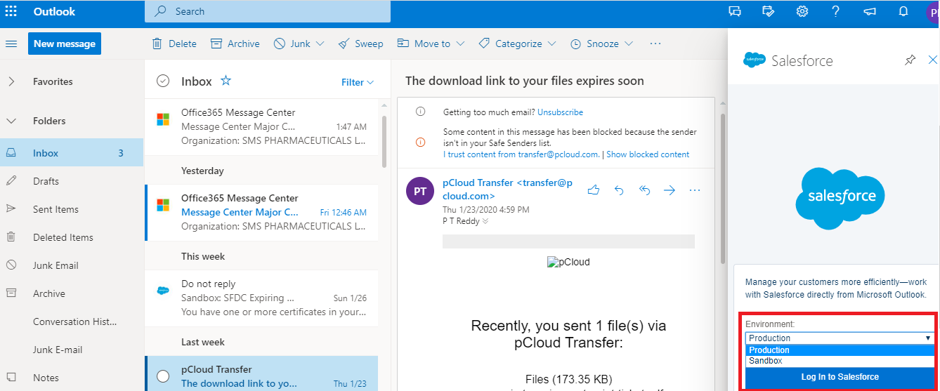
Once the salesforce plugin is added, login to salesforce where you can select your environment (Sandbox / Production).
Enter the salesforce login credentials and click on login. After successful connection we can see the standard objects displayed in the connector.
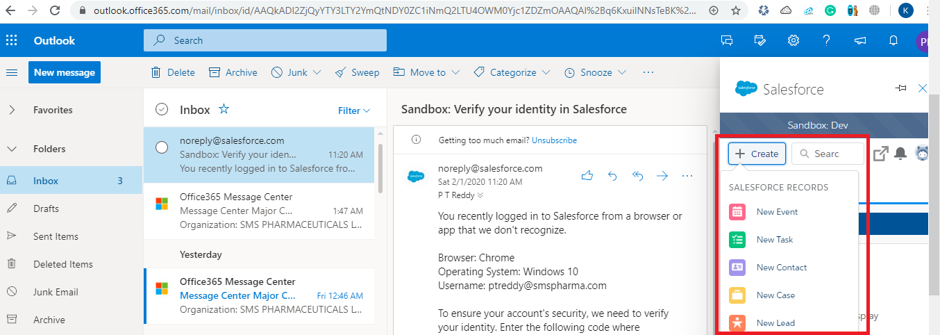
Now we can directly create Task, Event, Account, Contact and Lead from outlook to salesforce.
Now, we are going to learn how to add Custom Objects to this standard list.
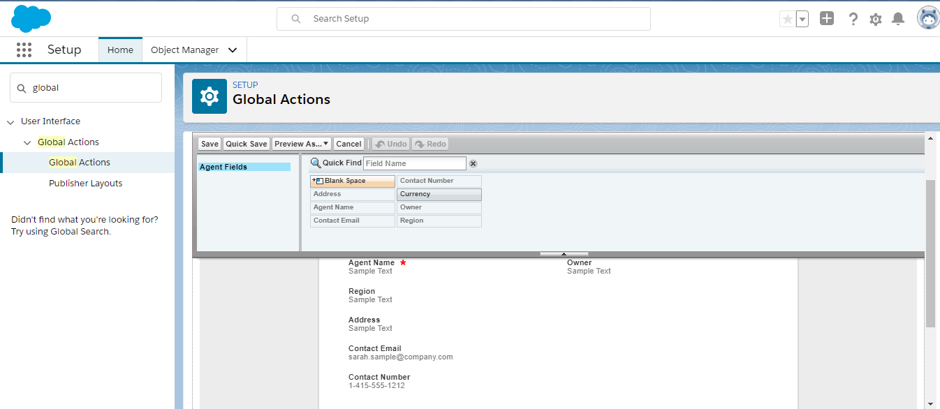
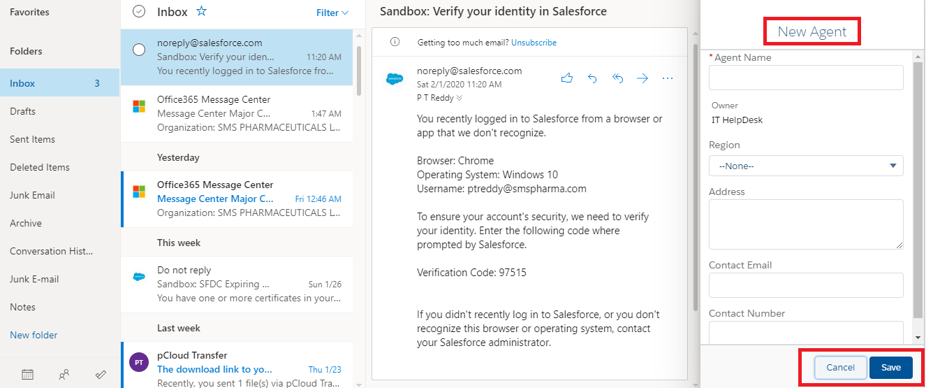
I have used a custom Object (Agent) and some custom fields to link with Outlook.
Go to salesforce and search for global action from search bar and then create a new global action.
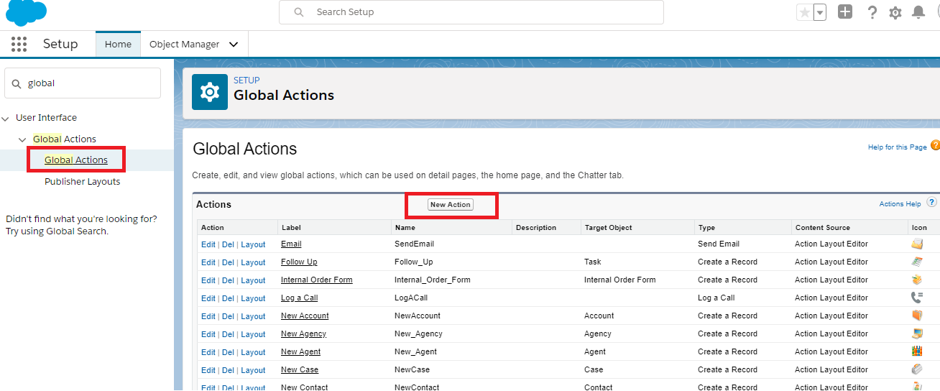
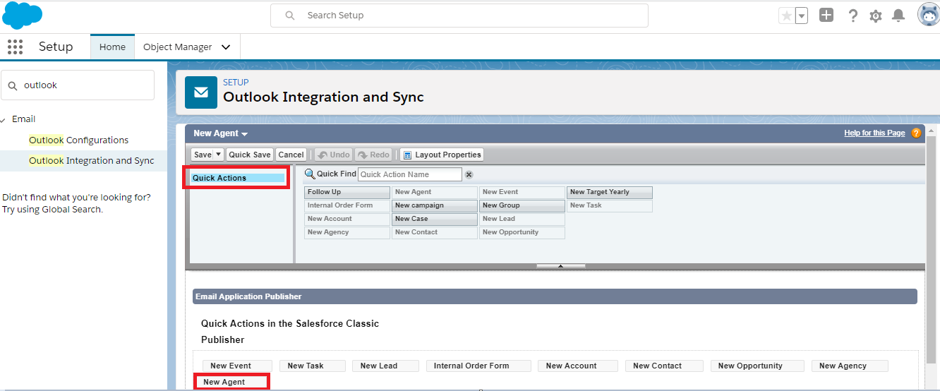
After creation of new global action (New Agent), it will take you through page layout of that action where we can add the necessary fields to that layout.
Enter Outlook in the search bar and click on Outlook Integration and Sync.
Expand the section of Outlook Integration and click on New Email Application Publisher Layout.
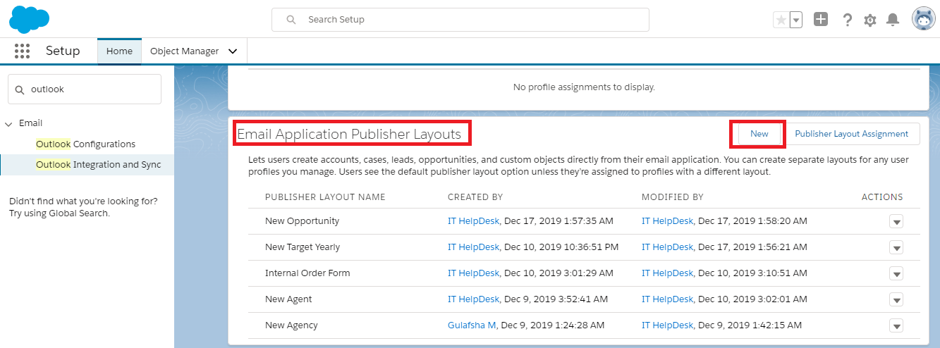
Create a new Layout and add the global action (New Agent) to Quick Action.
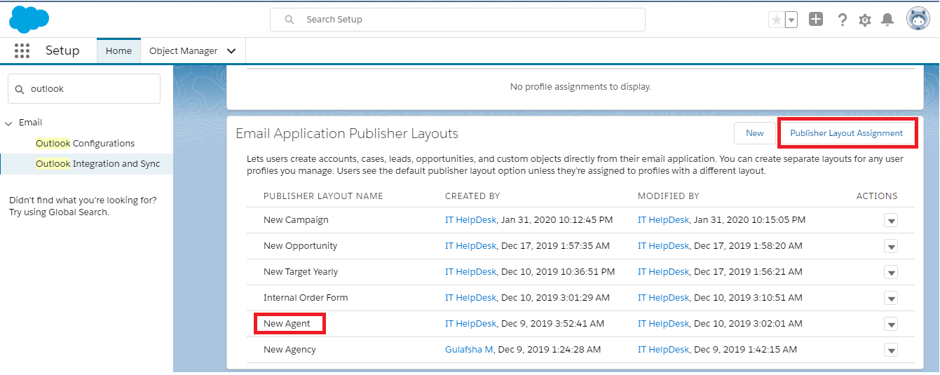
Now add the layout to profiles.
Click on Publisher layout assignment and add the layout to profiles.
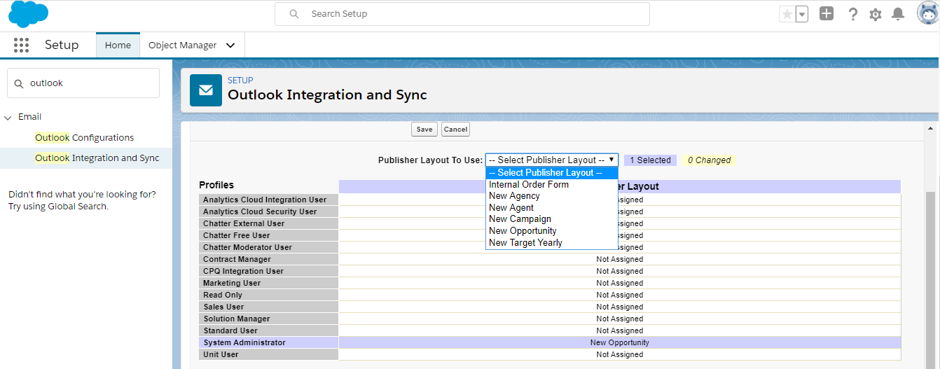
Once this is done, we can able to view custom objects along with standard objects in Outlook.
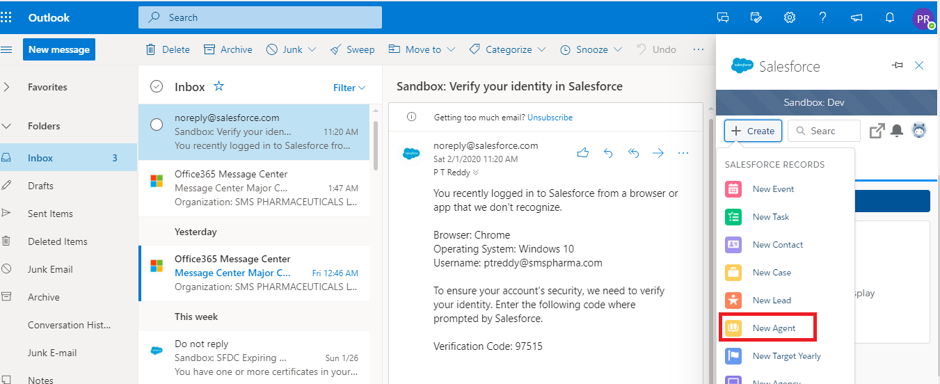
create a custom object data from outlook to salesforce.
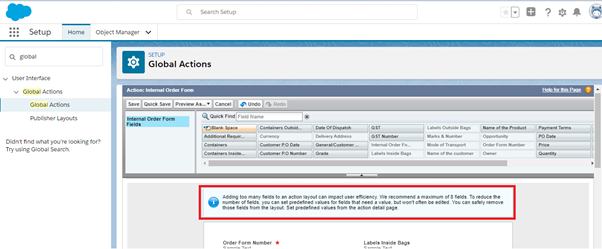
Limitations for creating Global action in salesforce.
- Adding too many fields to an action layout can impact user efficiency. We recommend a maximum of 8 fields. To reduce the number of fields, you can set predefined values for fields that need a value but won’t often be edited. You can safely remove those fields from the layout. Set predefined values from the action detail page.
- If we have record types for an object, we need to create global action for each record type because each record type has its own page layout.
- Custom Objects which are on the detail side of a master-detail relationship cannot be created via Global Action. A detail object record requires a master record and can’t be created in a non-entity-specific context.
- Ref—– https://help.salesforce.com/articleView?id=000337323&type=1&mode=1